Best Outdoor Living Design and Build Contractors In Baltimore County Maryland
License Information - MHIC143659
Request Free Consultation
Hero Request Form
Why Choose Bayside Outdoor Living?
We're not just landscapers, we're creators of outdoor experiences. Our commitment to quality craftsmanship, our efficient and organized team, and our stress-free process set us apart. We're fully licensed and insured, and we stand behind our work with a 3-year labor warranty. Plus, we offer free landscape consultations and 3D design renderings, so you can visualize your dream outdoor space before we even break ground. Choose Bayside Outdoor Living, and let us bring your outdoor living dreams to life.
Landscape Design and Enhancement
Our landscape designers create stunning, customized designs that enhance your outdoor space. We also offer enhancement services to keep your landscape looking its best.
Outdoor Lighting
Illuminate your outdoor space with our outdoor lighting services. Bayside Outdoor Living can design a lighting plan that highlights your landscape's features and creates a warm, inviting atmosphere.
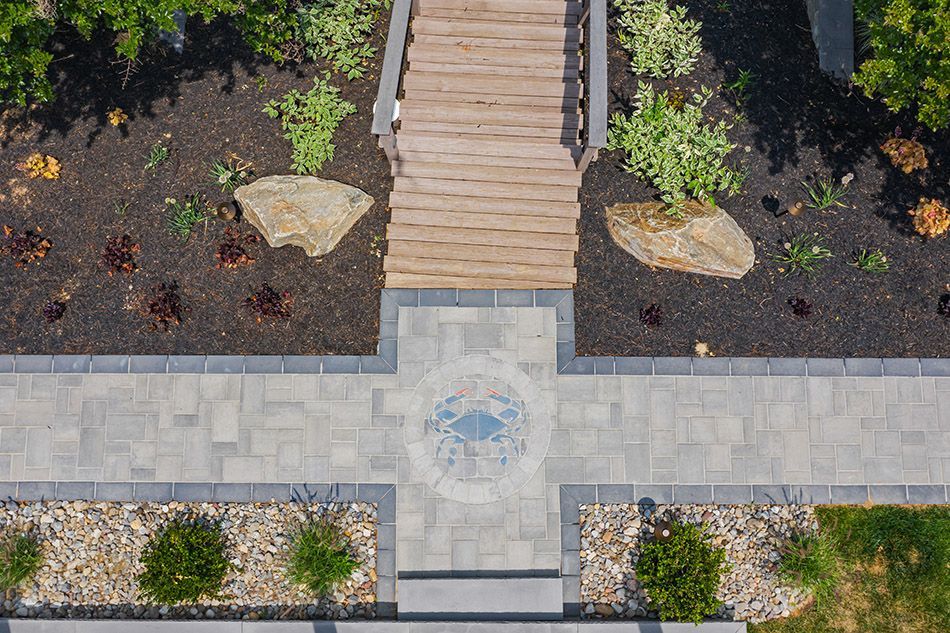
Patios and Hardscaping
From patios and walkways to retaining walls, our hardscaping services add functionality and beauty to your outdoor space. We use high-quality materials to ensure durability and longevity.
Grading and Drainage
Proper grading and drainage are crucial to the health and longevity of your landscape. We provide expert grading and drainage services to protect your property from water damage.
Sod and Artificial Turf Installation
Enjoy a lush, green lawn all year round with our artificial turf installation services. Our high-quality turf is durable, low-maintenance, and looks incredibly realistic.
General Contracting
We manage all aspects of your outdoor project, Trust Bayside Outdoor Living for decks, pergolas, and pavilions from start to finish. Estimates can be provided to you within 1 week.
Outdoor Living
We believe your outdoor space should be an extension of your home. From outdoor kitchens to firepits, we create outdoor living areas that are perfect for relaxing and entertaining.
Financing Available
Bayside Outdoor Living offers financing options through HFS Financial to help you get the outdoor living area you want. It's a quick, 4-step process to help you get your project started.


Here's what our satisfied customers are saying...
At Bayside Outdoor Living, we take pride in providing exceptional landscape design, hardscaping, and outdoor living services to our customers. We would be grateful if you could share your thoughts about our business with others. Your feedback helps us to improve and helps others make informed decisions. Please take a moment to leave a review of Bayside Outdoor Living and let others know what you think.
Share On: