
CRAB SHACK
CRAB SHACK
KEY ELEMENTS
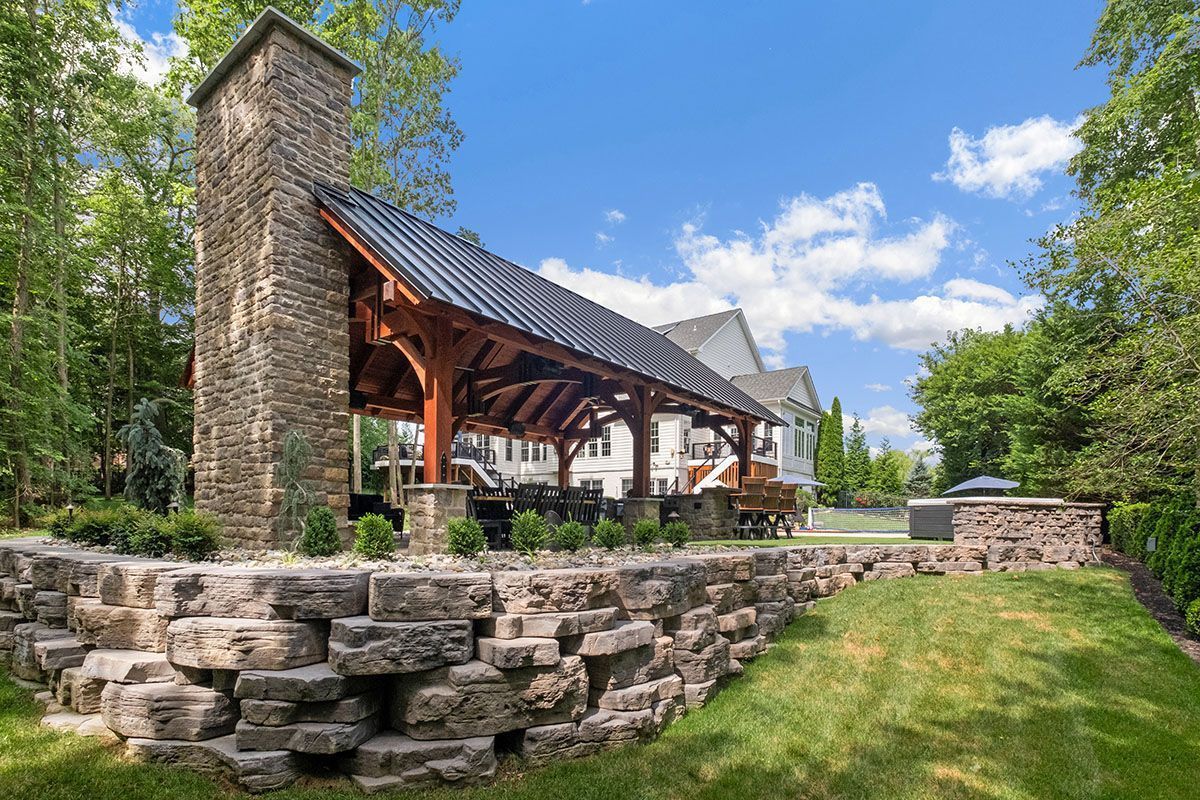
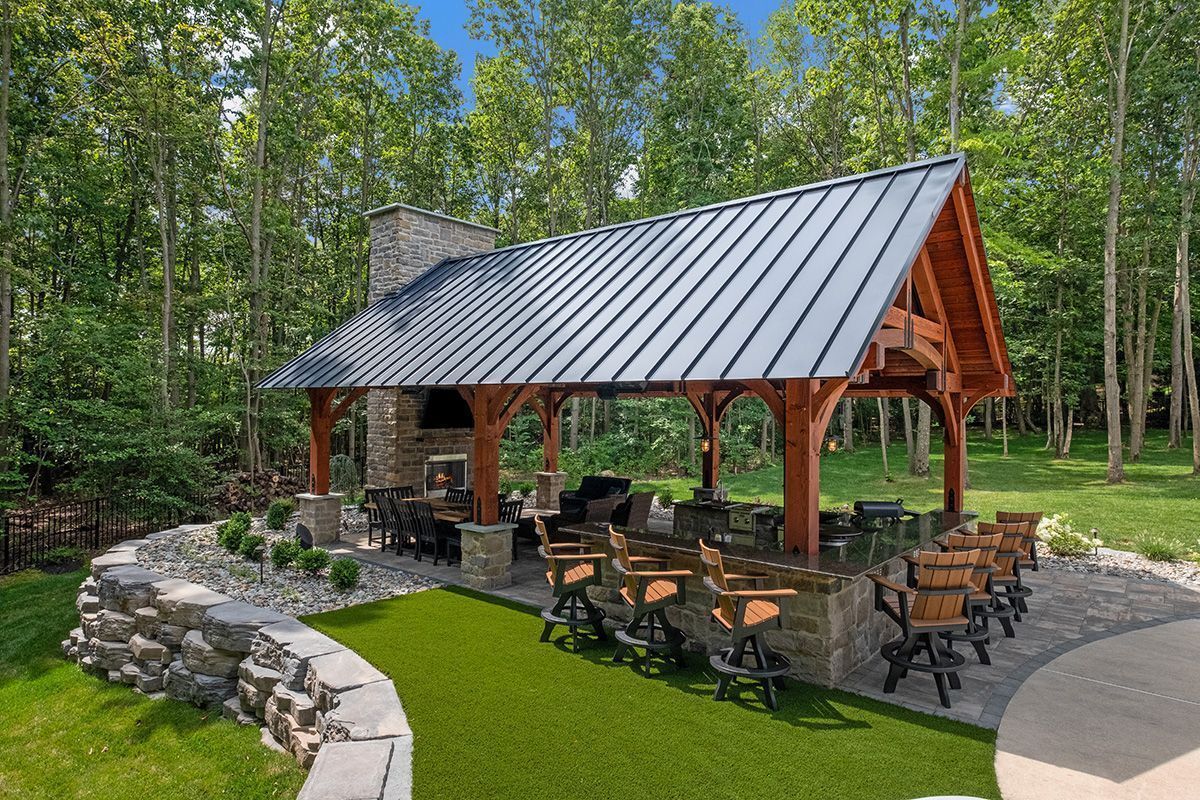
- Engineered structural retaining wall — Rosetta outcropping, natural-stone appearance, up to ~6.5 ft tall
- Full site elevation to create a level, usable backyard
- Extensive tree removal and site clearing
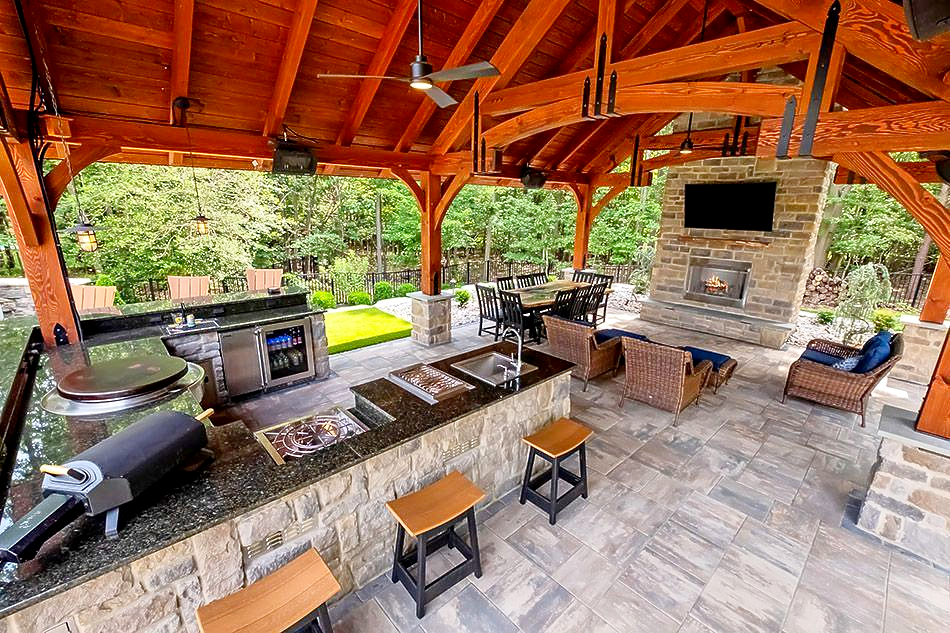
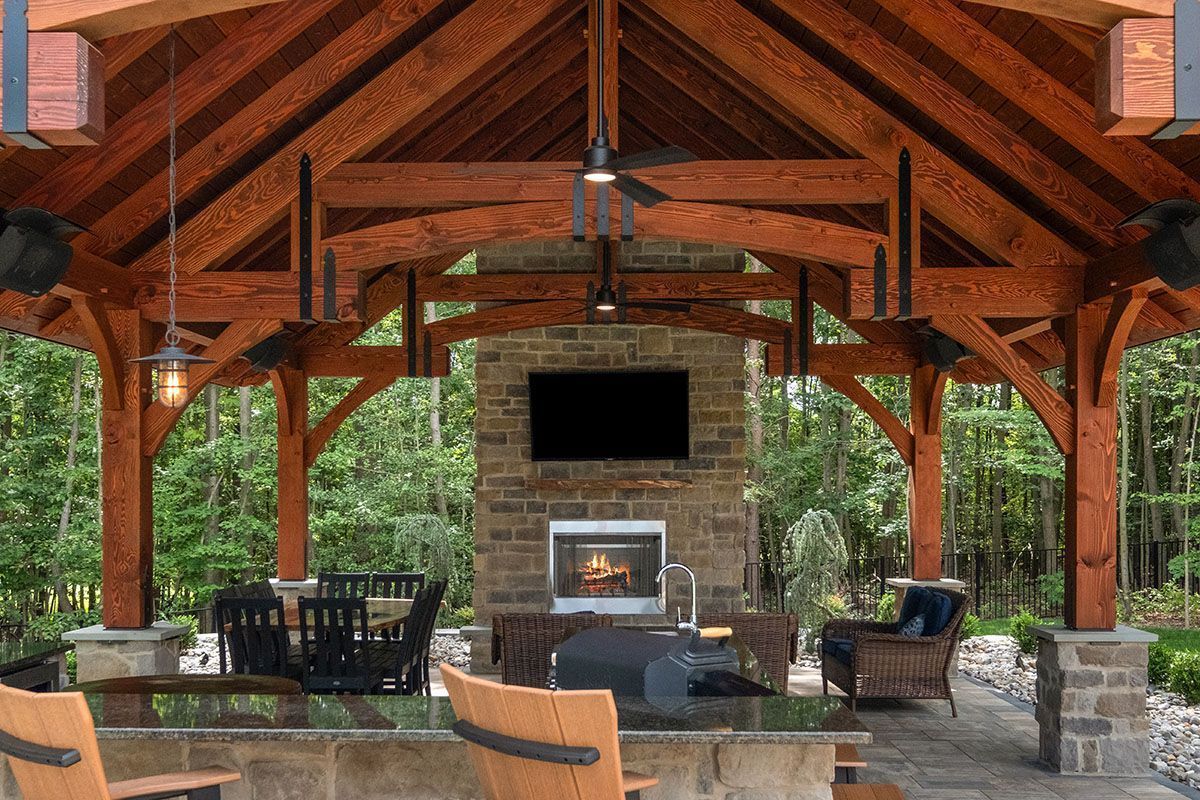
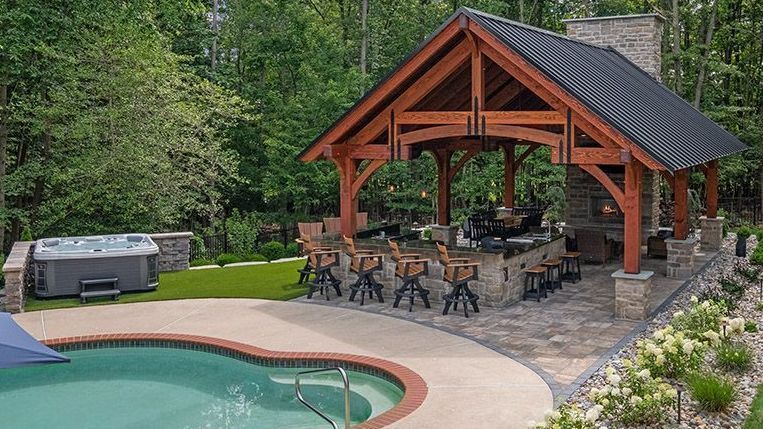
- 20x30 timber-frame pavilion (Grand Teton) on concrete foundations and footers
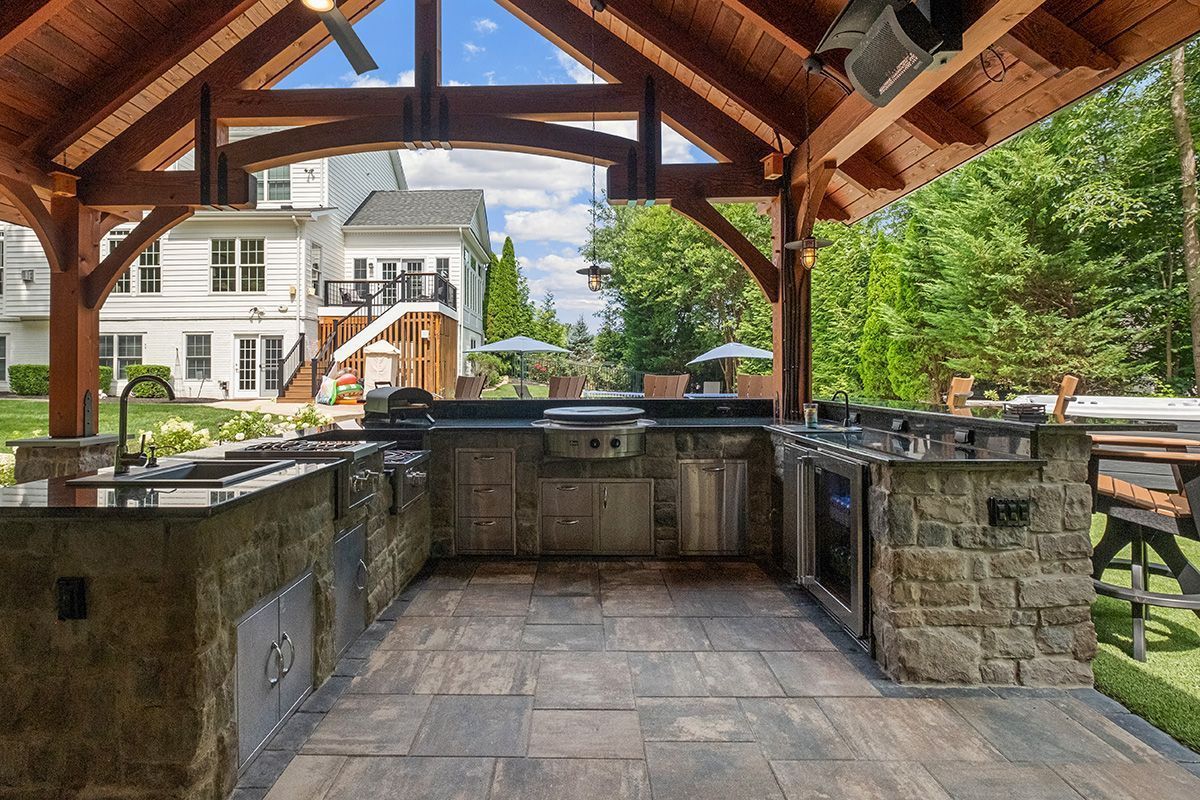
- Outdoor kitchen finished in El Dorado Stone with concrete footers
- Kitchen appliances: Evo grill, large crab/seafood boiler, power burner, pizza oven, ice maker, refrigerator, sink, and a draft drink dispenser (multiple taps)
- Counter-height seating plus two sections of barstool seating
- Stone-finished gas fireplace
- Pavilion buildout: full electric, gas heaters, ceiling fans, TV with dedicated Cat6 line, plumbing
- Coastal Source outdoor sound system
- Artificial turf sections — behind the outdoor kitchen and at the hot tub location
- Hot tub
- Landscaping and low-voltage outdoor lighting throughout the property and entryways
CHALLENGES
The homeowners had just purchased the house, and the backyard was essentially unusable. Past the pool deck, the ground dropped off in a steep, wooded hill — a drastic grade change packed with trees and no clean, level area to build on. Before anything could happen, the space had to be reclaimed: significant tree removal to open the yard, and engineered wall work to hold back the hillside and create flat, usable ground where there simply wasn't any.
THE PLAN
John's plan started with the structure the site needed. The team brought in wall engineering and built a Rosetta outcropping retaining wall — formed concrete block designed to read as natural stone — reaching up to about six and a half feet at its tallest point to hold back the grade and elevate the entire space. Concrete foundations and footers were poured for the pavilion and fireplace, then the 20x30 Grand Teton timber-frame pavilion went up as the centerpiece. From there the build became a fully outfitted outdoor living space: an El Dorado Stone outdoor kitchen loaded with an Evo grill, seafood boiler, power burner, pizza oven, refrigeration, ice maker, sink, and a multi-tap drink dispenser, wrapped with counter-height and barstool seating. The pavilion was finished with full electric, gas heaters, ceiling fans, a gas fireplace, and a TV run on a dedicated Cat6 line for reliable connectivity. A Coastal Source sound system was added to carry audio across the whole area, turf sections were set behind the kitchen and at the hot tub, and the entire backyard was finished with landscaping and outdoor lighting through the property and entryways. Start to finish, the project ran approximately 36 working days — close to two months.
THE RESULTS
What started as a steep, wooded drop-off with no usable space became a fully realized backyard entertaining destination
The engineered outcropping wall reclaimed the hillside and gave the yard a level footprint, while the 20x30 timber-frame pavilion anchors the space as a true outdoor room — complete with a gas fireplace, heaters, ceiling fans, TV, and sound.
The El Dorado Stone kitchen turns it into a genuine crab-shack setup built for seafood boils and big gatherings, backed by full seating, a hot tub, turf, and lighting and landscaping that carry the whole property into the evening. A backyard that couldn't be used at all is now the highlight of the home.
Start With a Conversation
Reach out and tell us a little about your property, your goals, and the outdoor space you have been imagining. This first conversation helps us answer initial questions and make sure Bayside Outdoor Living feels like the right potential fit for your project.
Walk the Space Together
If the project feels aligned, one of our design specialists will visit your home to walk the space with you. We will listen to your ideas, study the property, and talk through how you want to live, relax, and gather outside.
Bring the Vision Into 3D
After the on-site visit, your design specialist will begin creating a custom 3D design for your outdoor living space. This typically takes one to two weeks and helps you clearly see how the layout, features, and flow can come together.
Review the Design and Investment
Once the 3D design is ready, we will review it with you in detail. Together, we will walk through the layout, materials, features, and project investment so you understand the full vision and what it would take to build.
Refine the Details and Schedule
If you decide to move forward, we will make any needed adjustments based on your feedback. Once the final details are approved, we will schedule your installation and prepare our in-house team for the build.
Build and Walk It Together
On the start date, your design specialist will walk the space with the team building your project. Throughout the build, we stay connected, communicate clearly, and complete a final walkthrough with you to make sure every detail feels right.