
MODERN VISTA
MODERN VISTA
KEY ELEMENTS
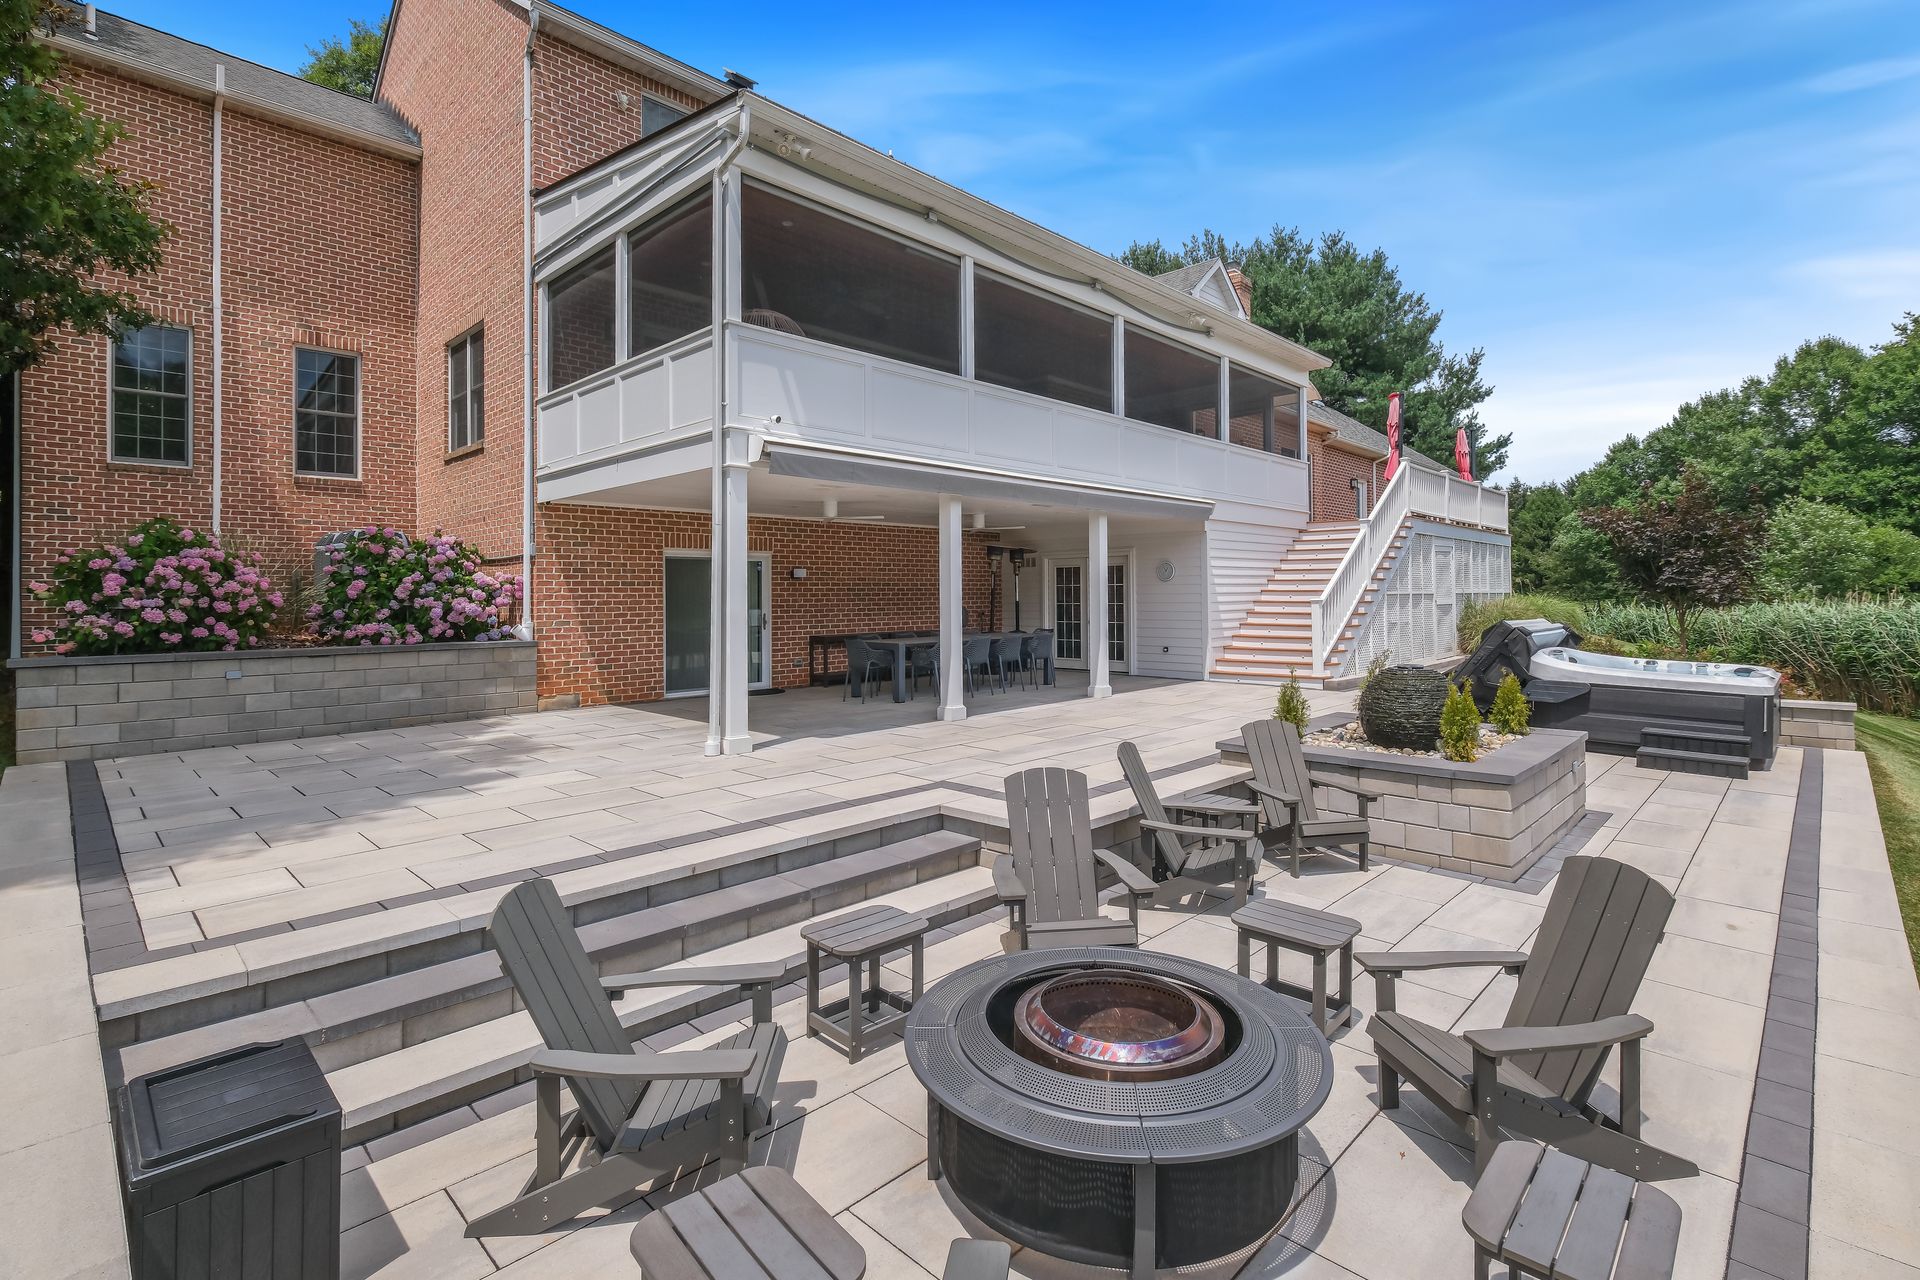
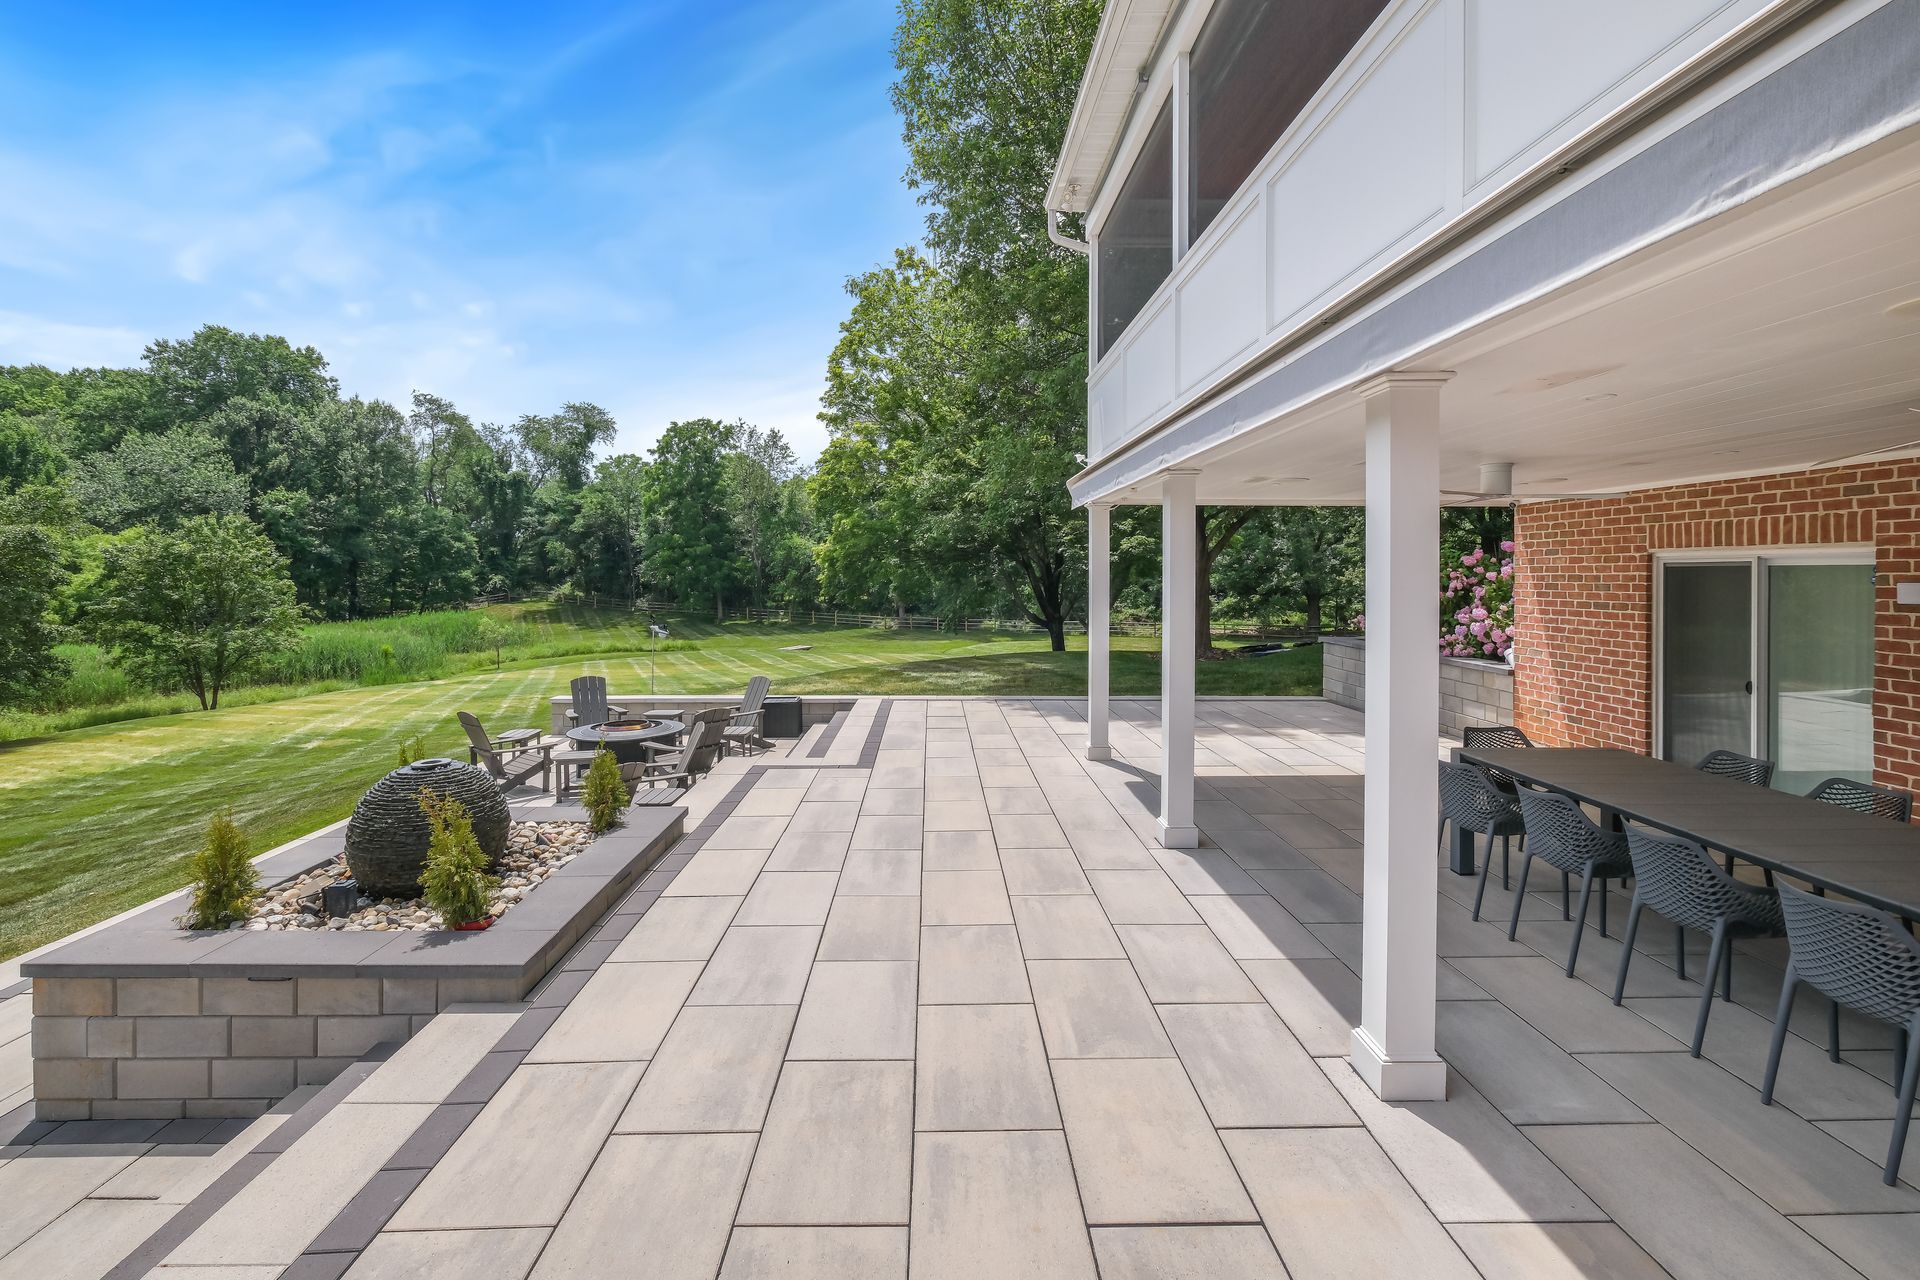
- Full demolition of the existing patio
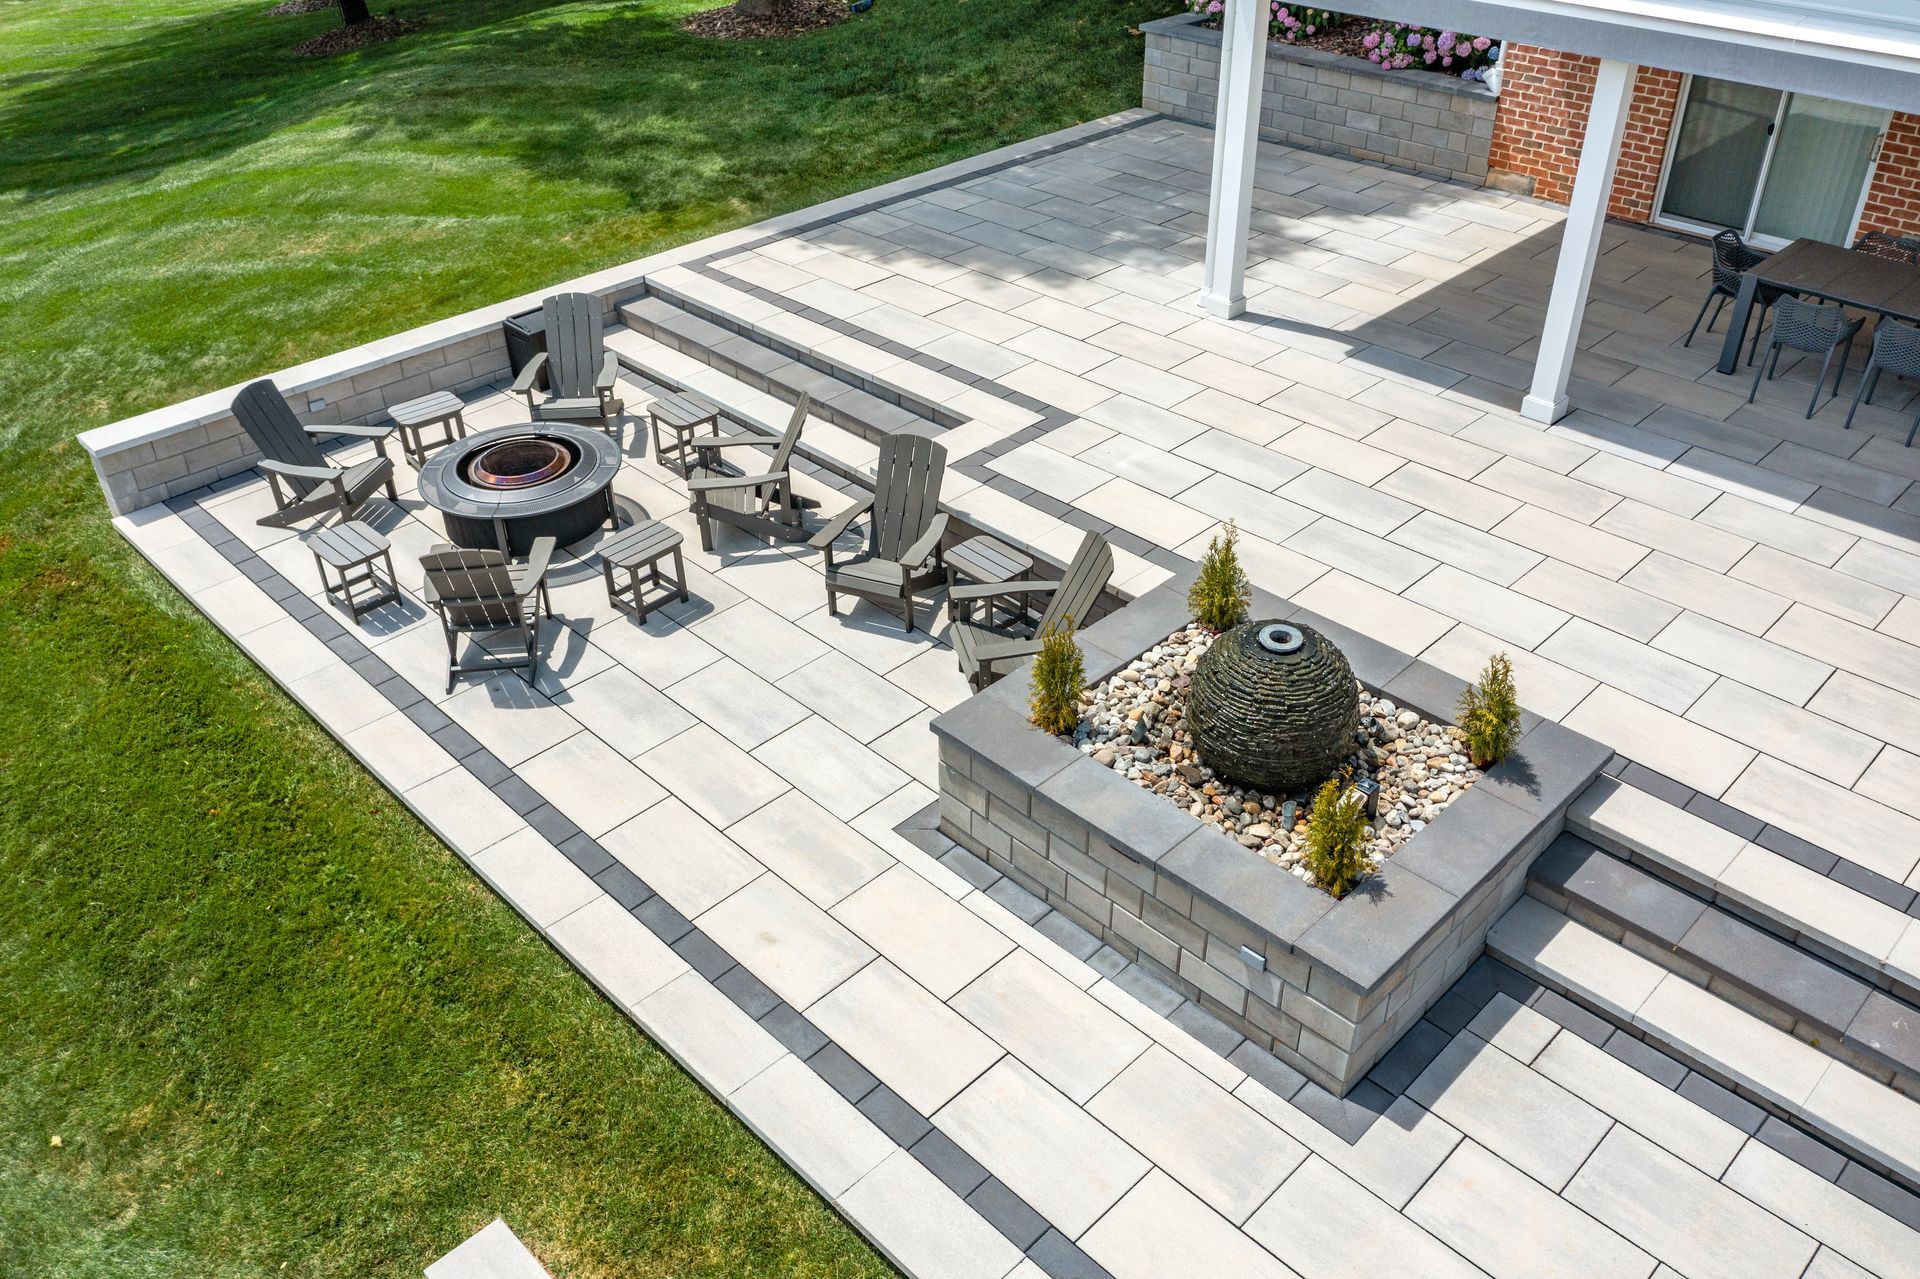
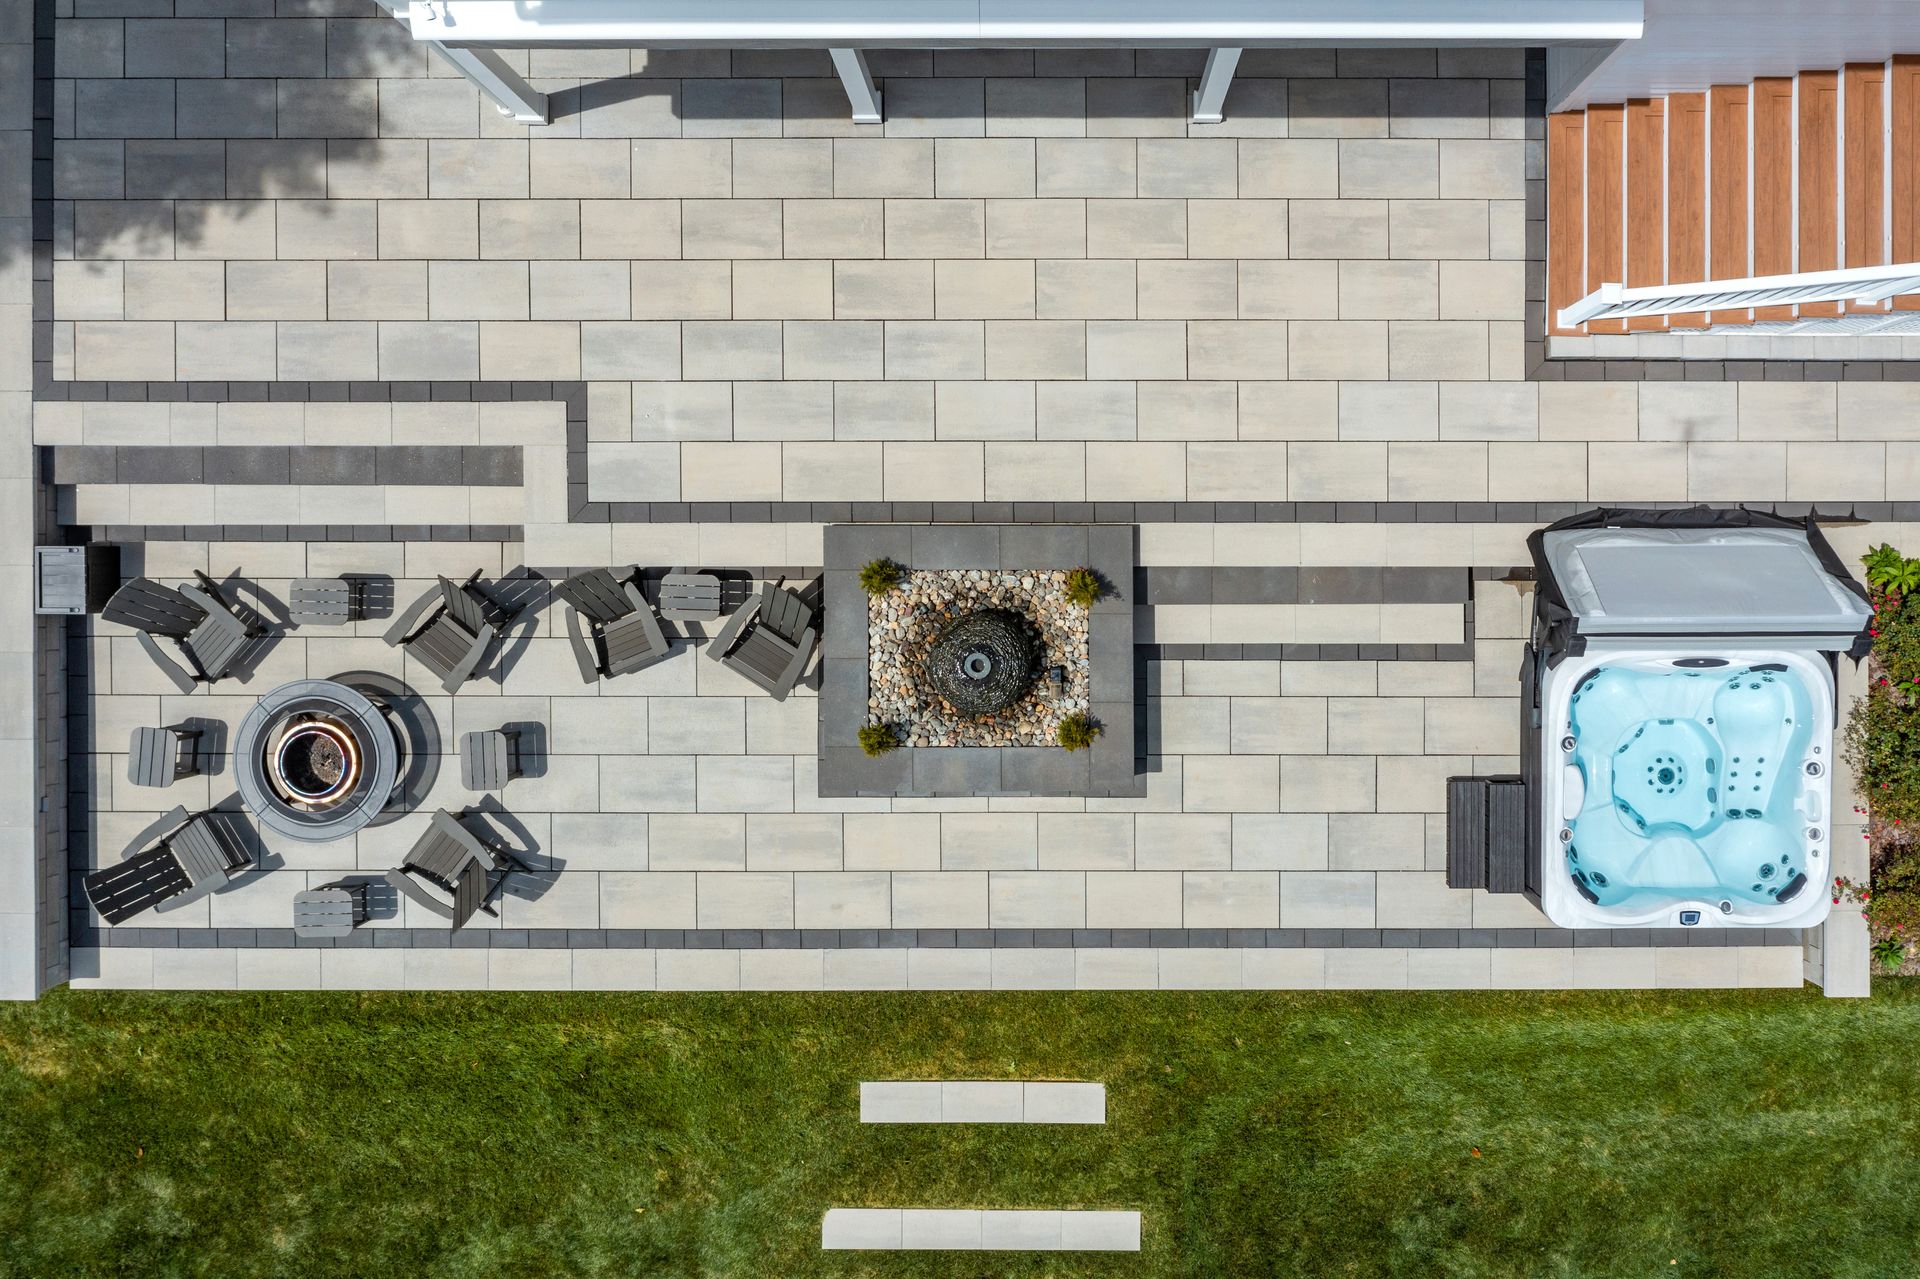
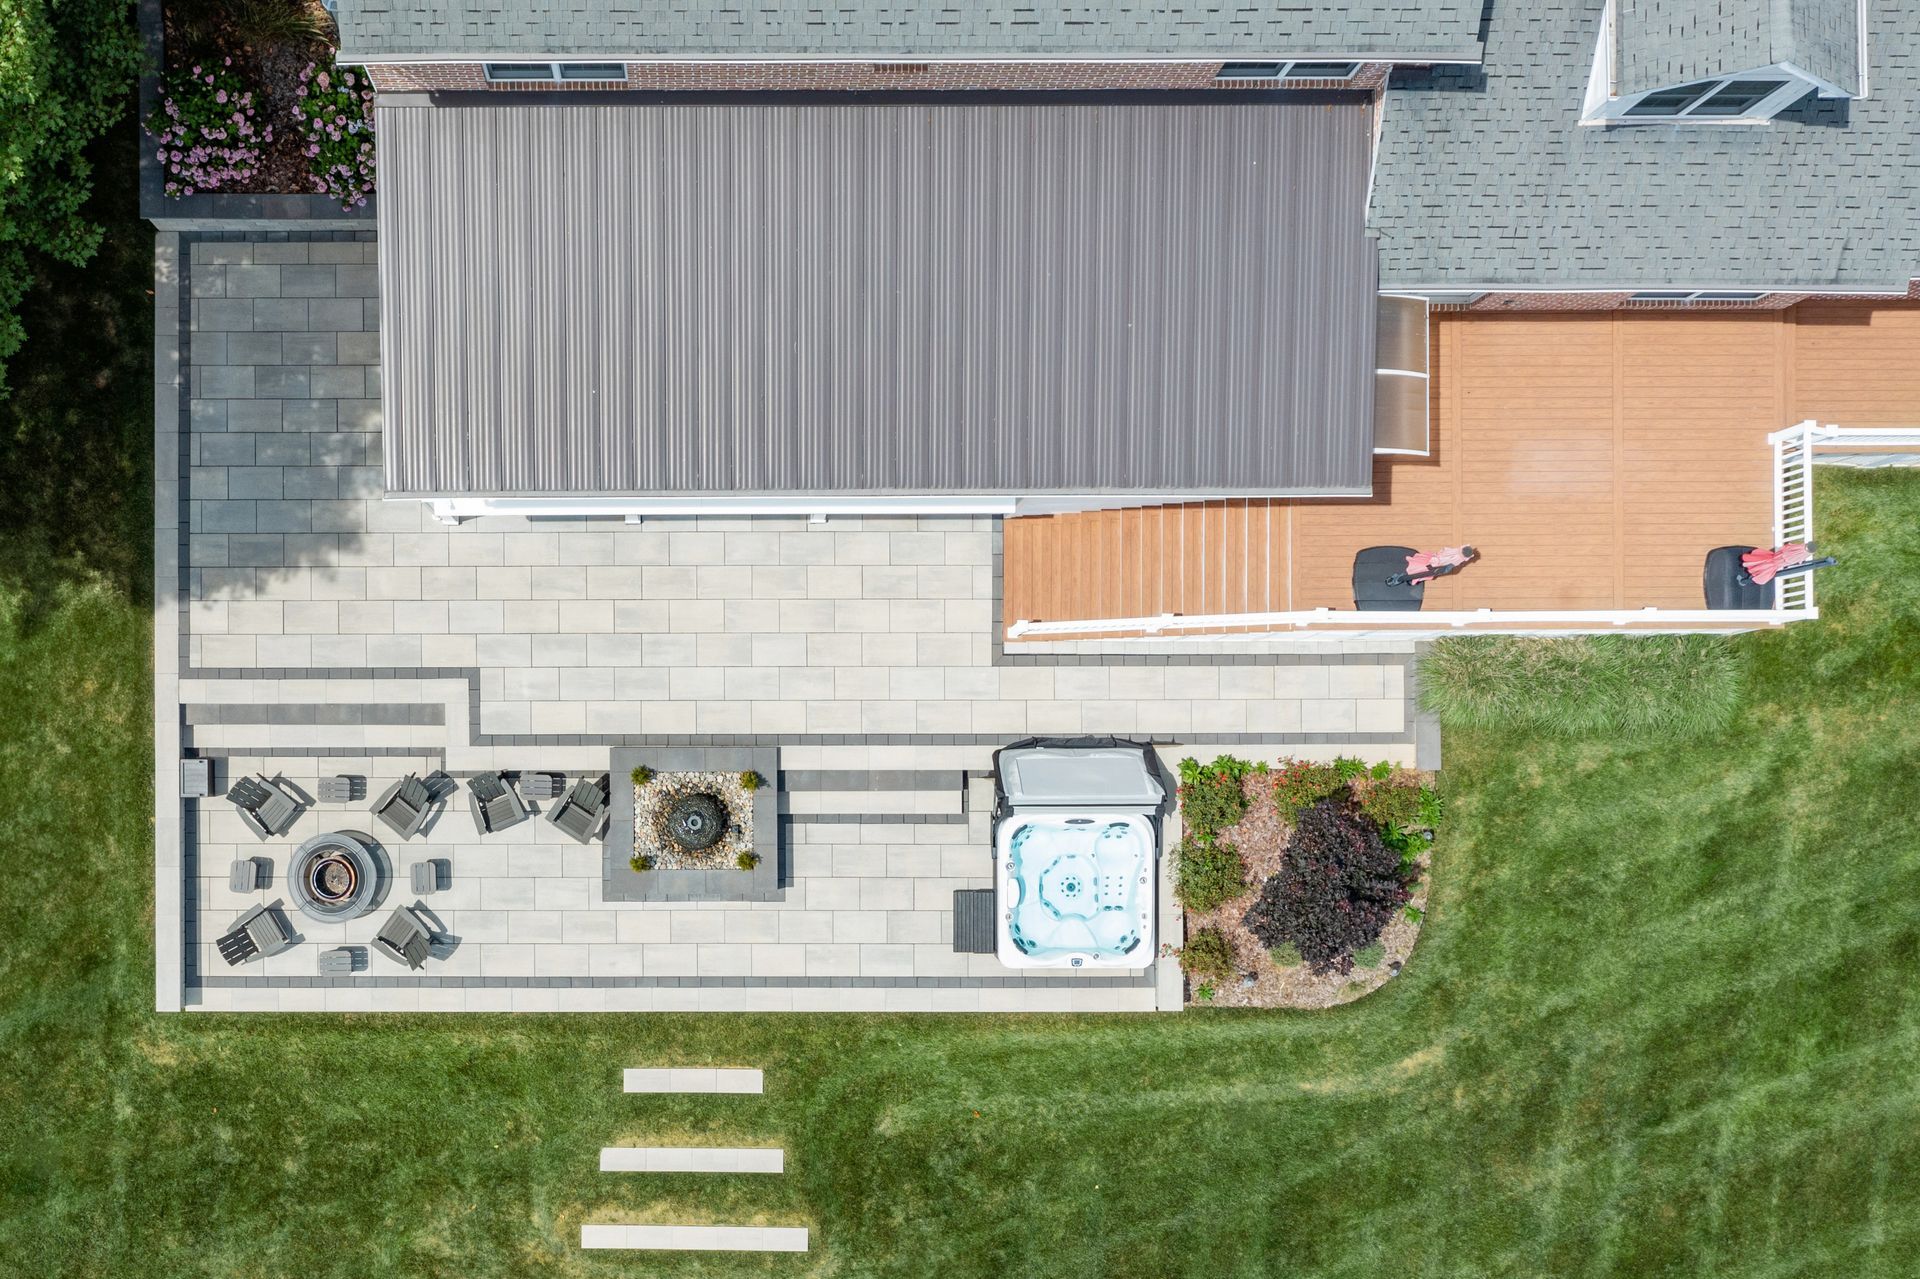
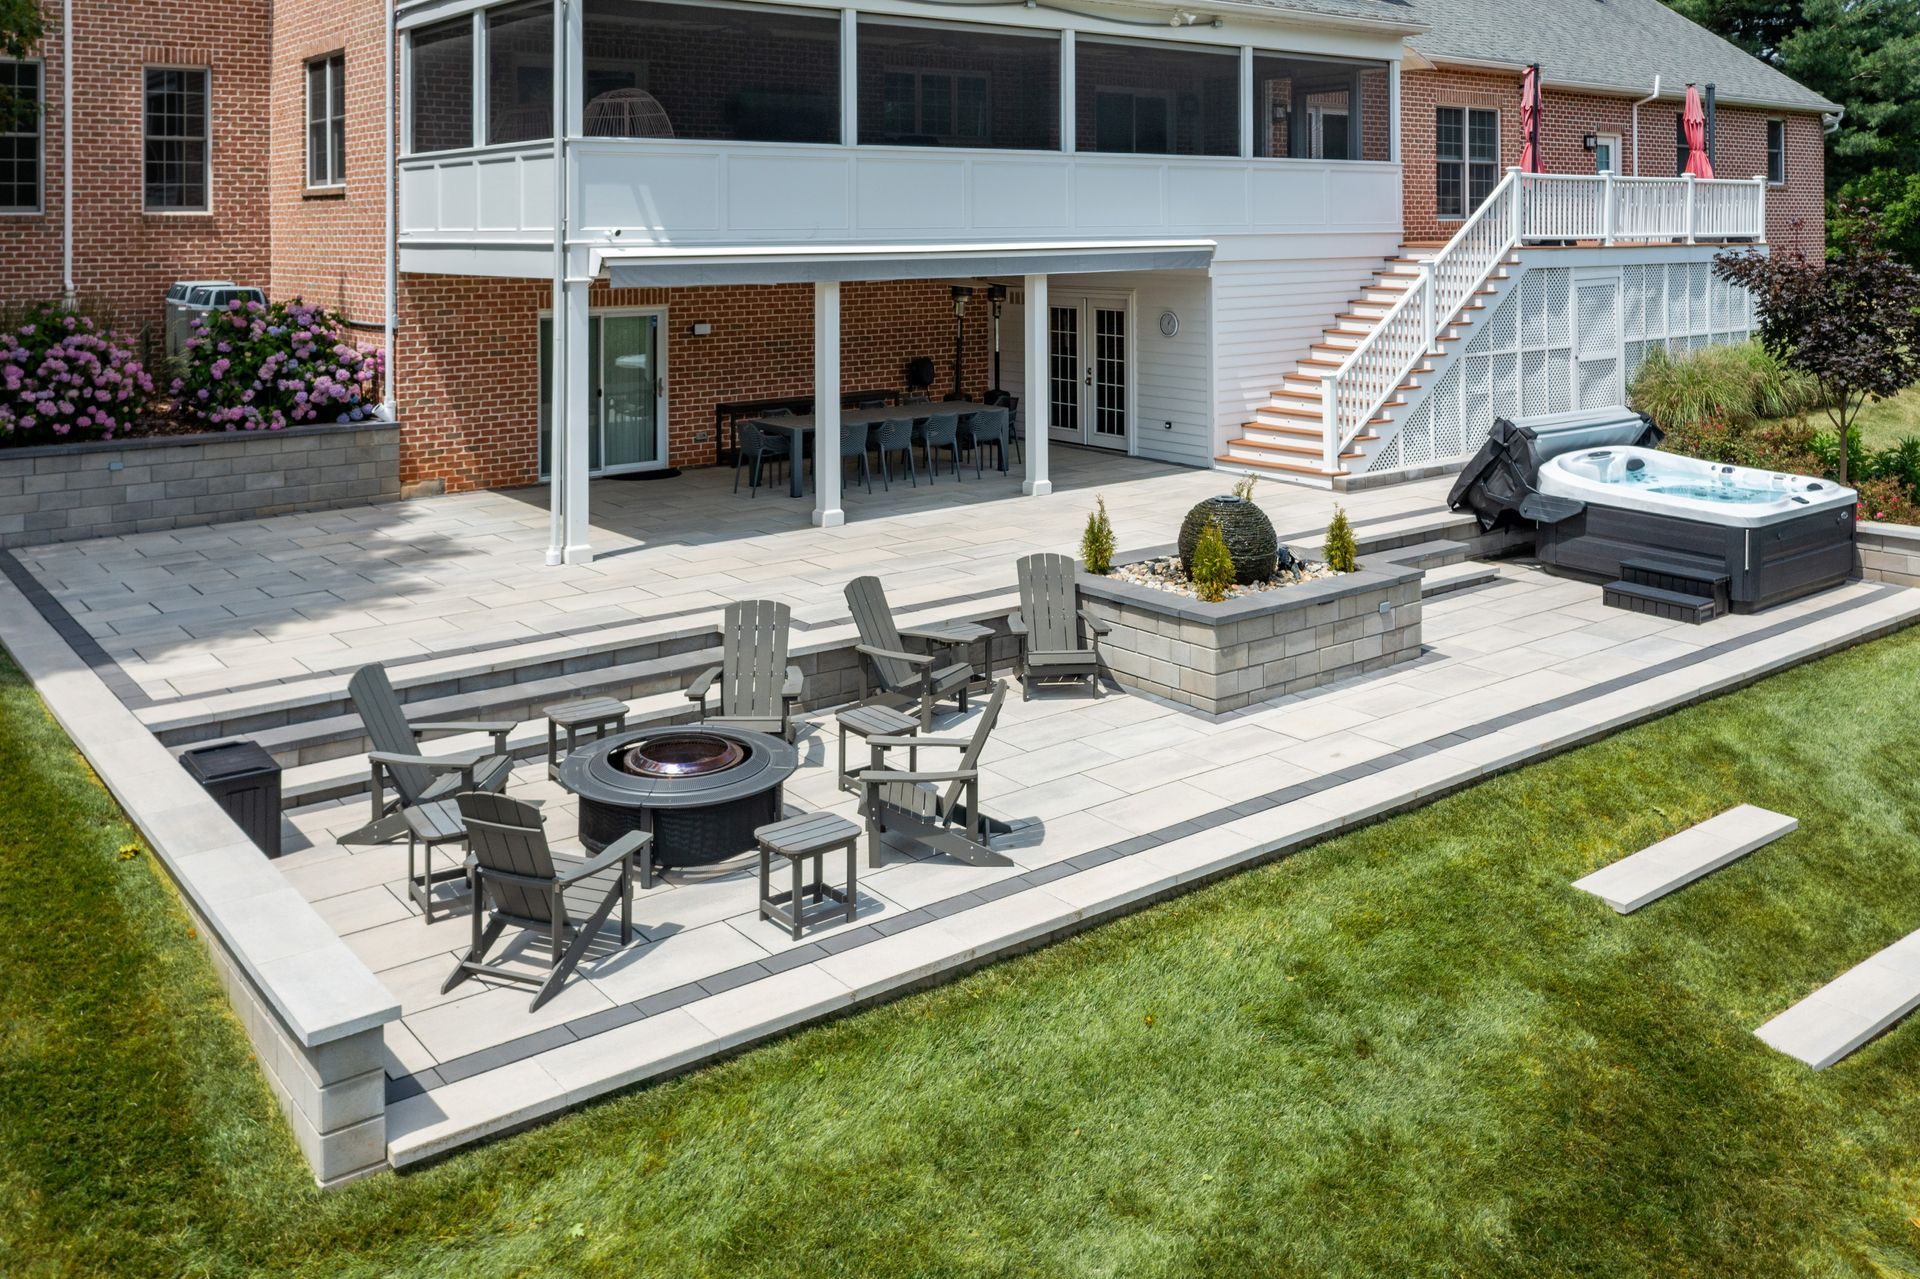
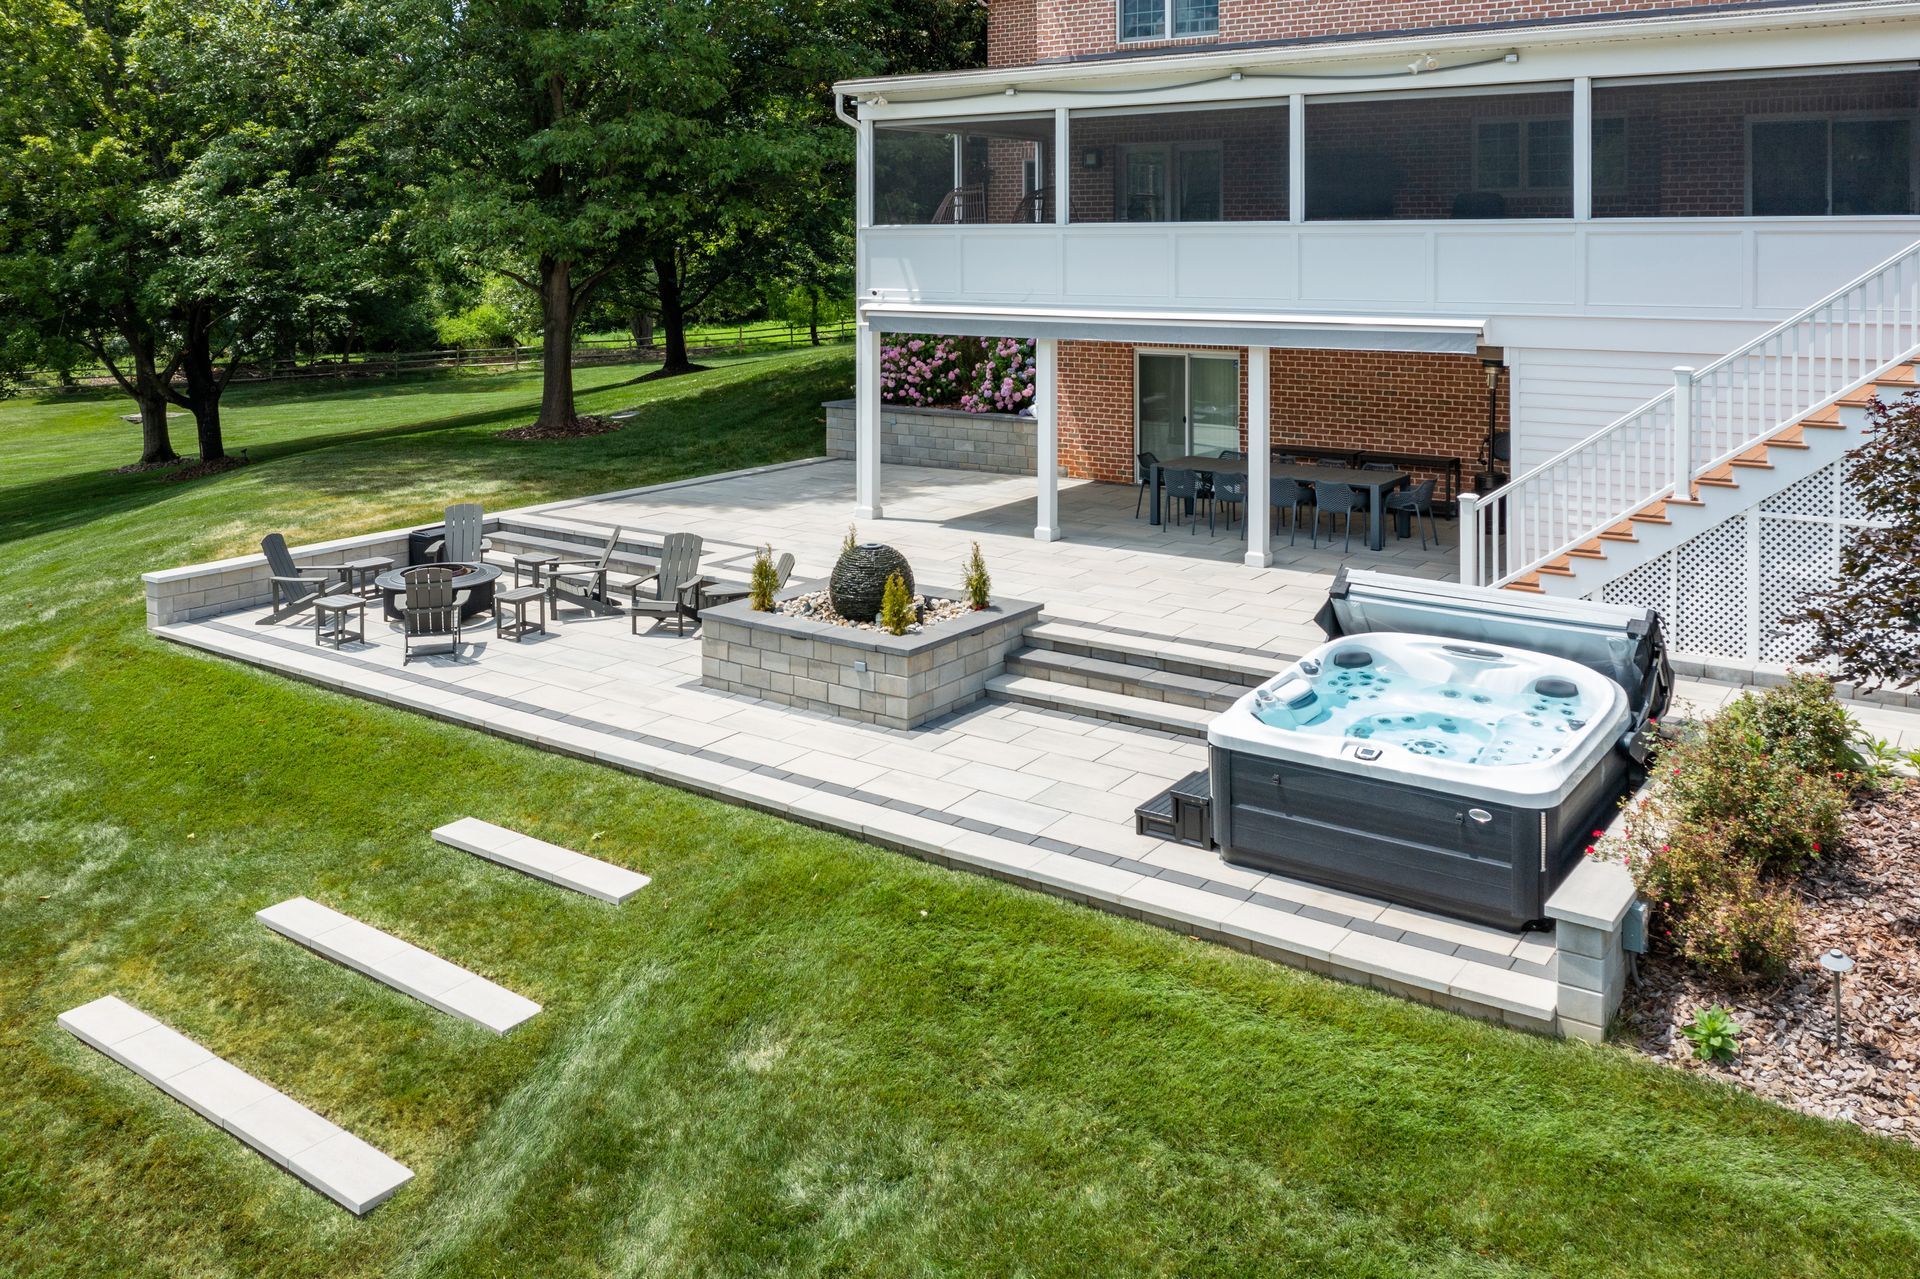
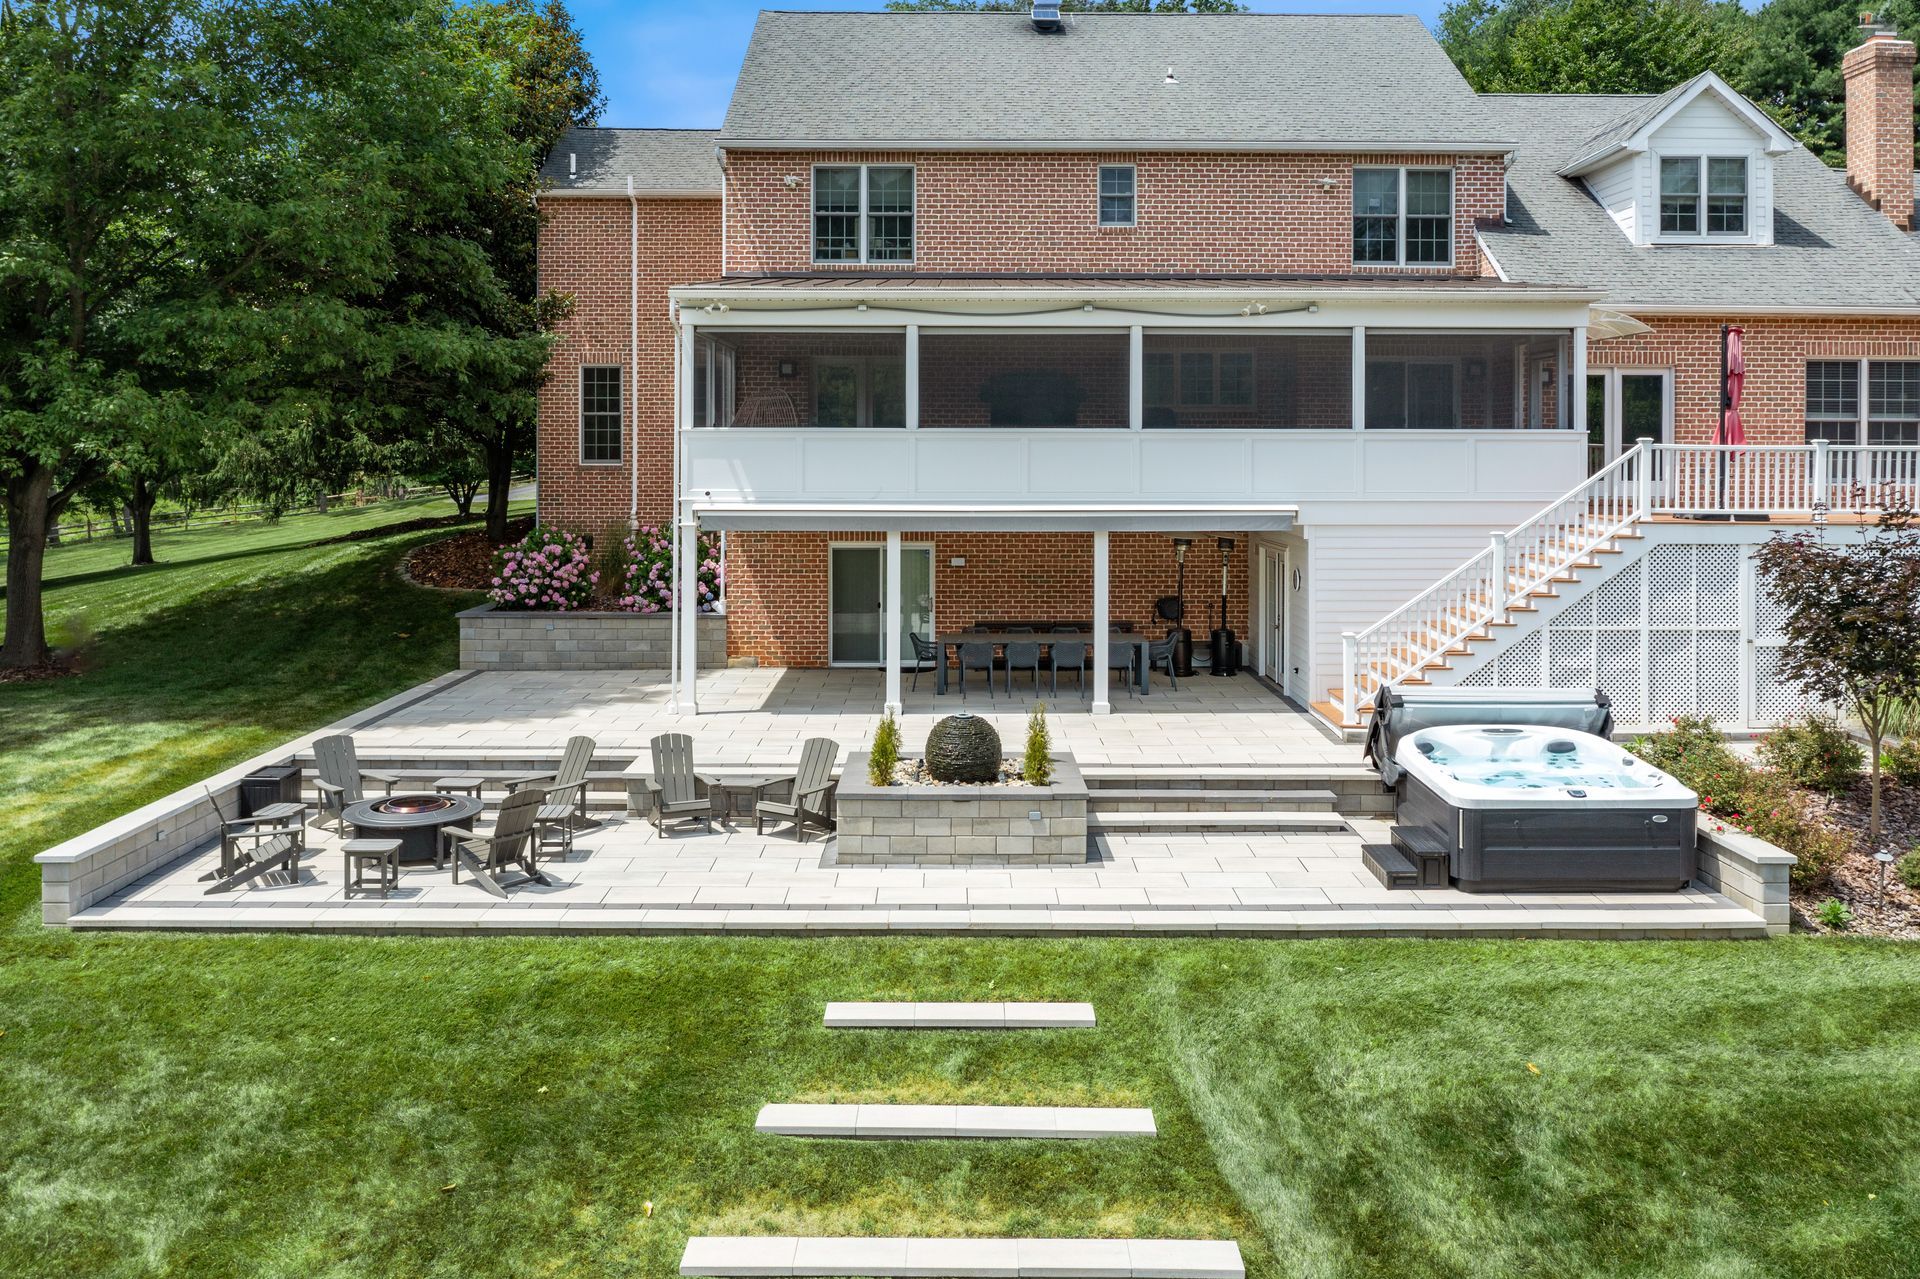
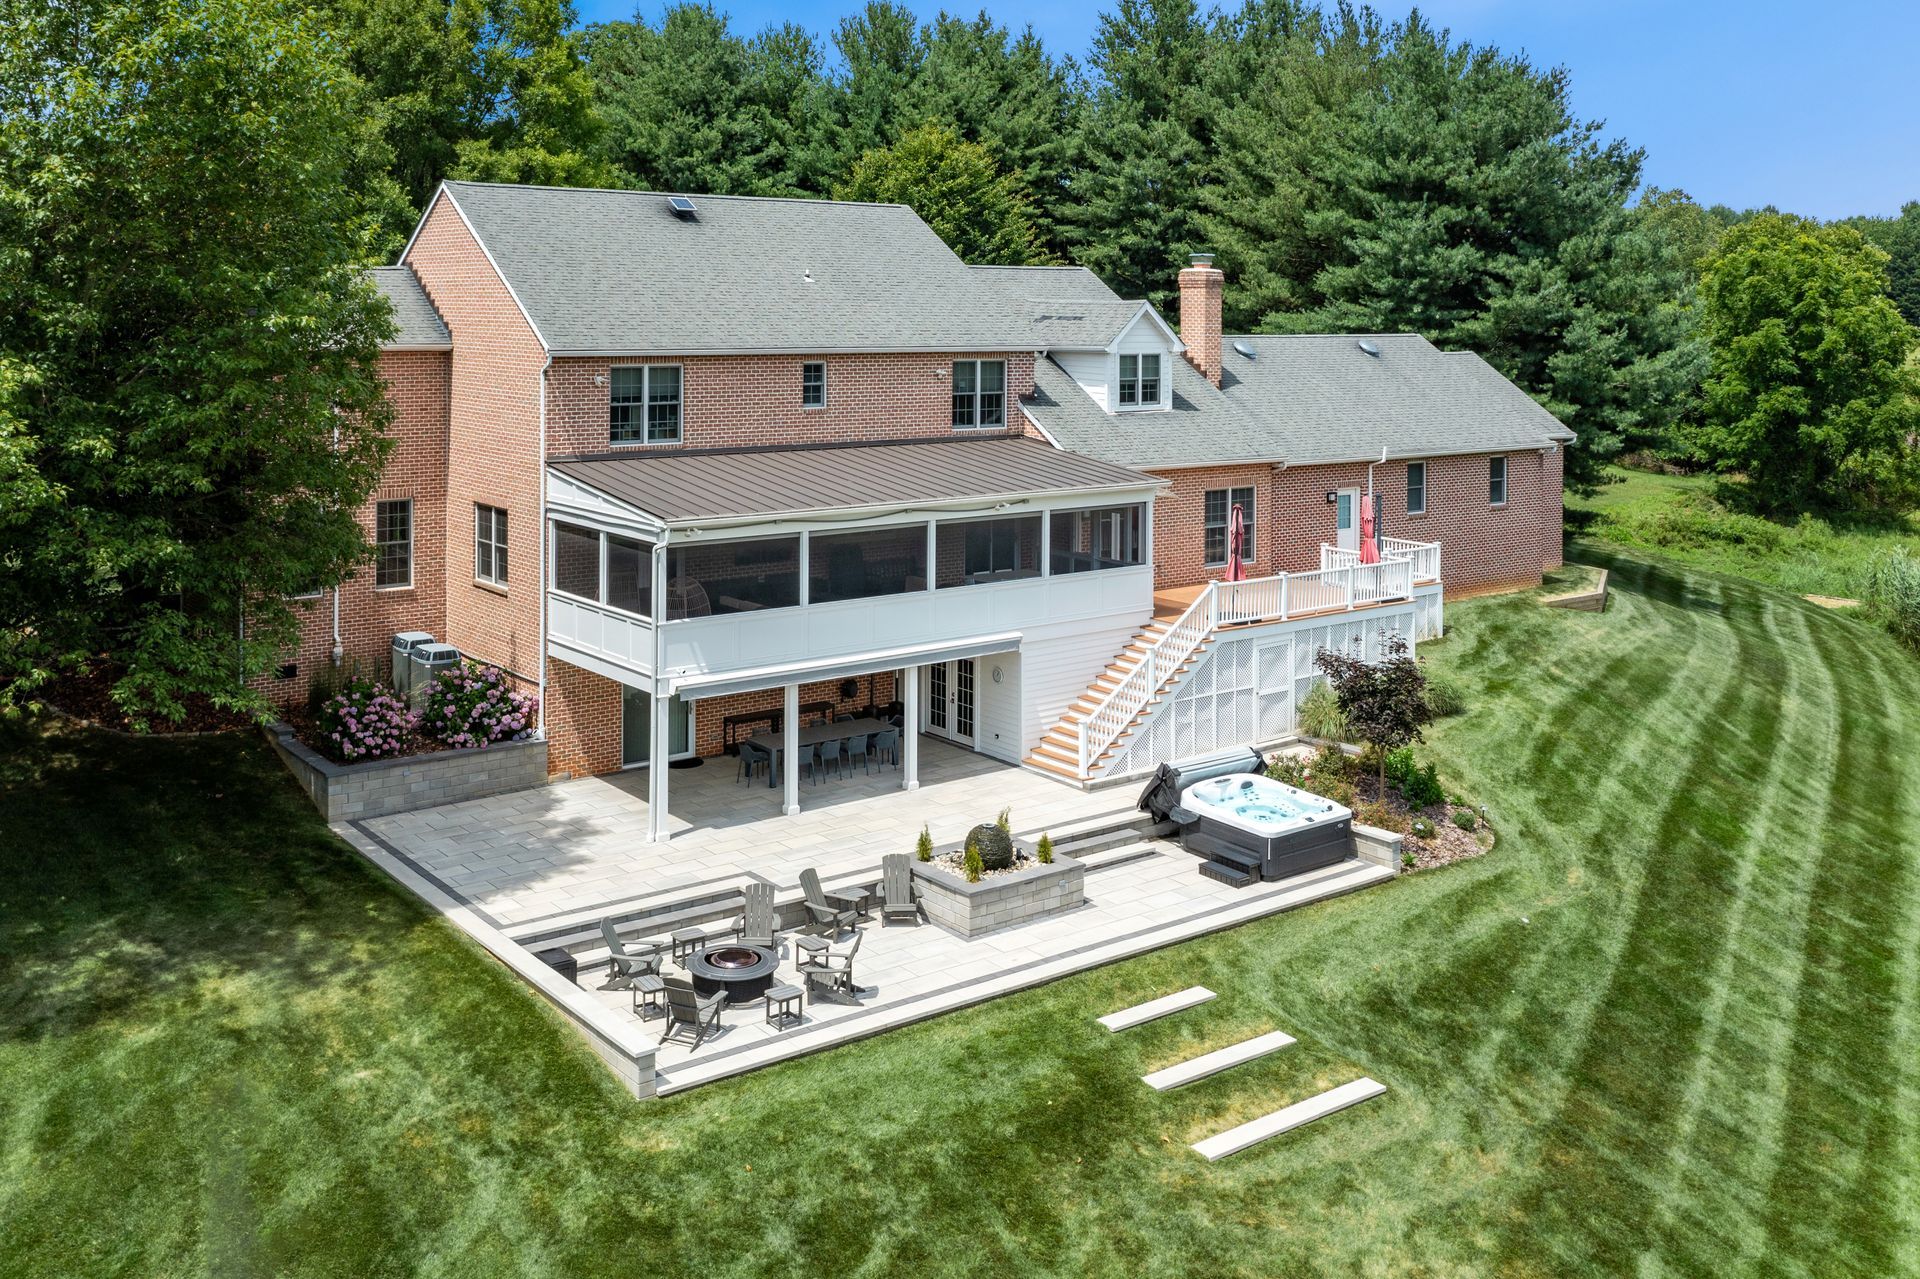
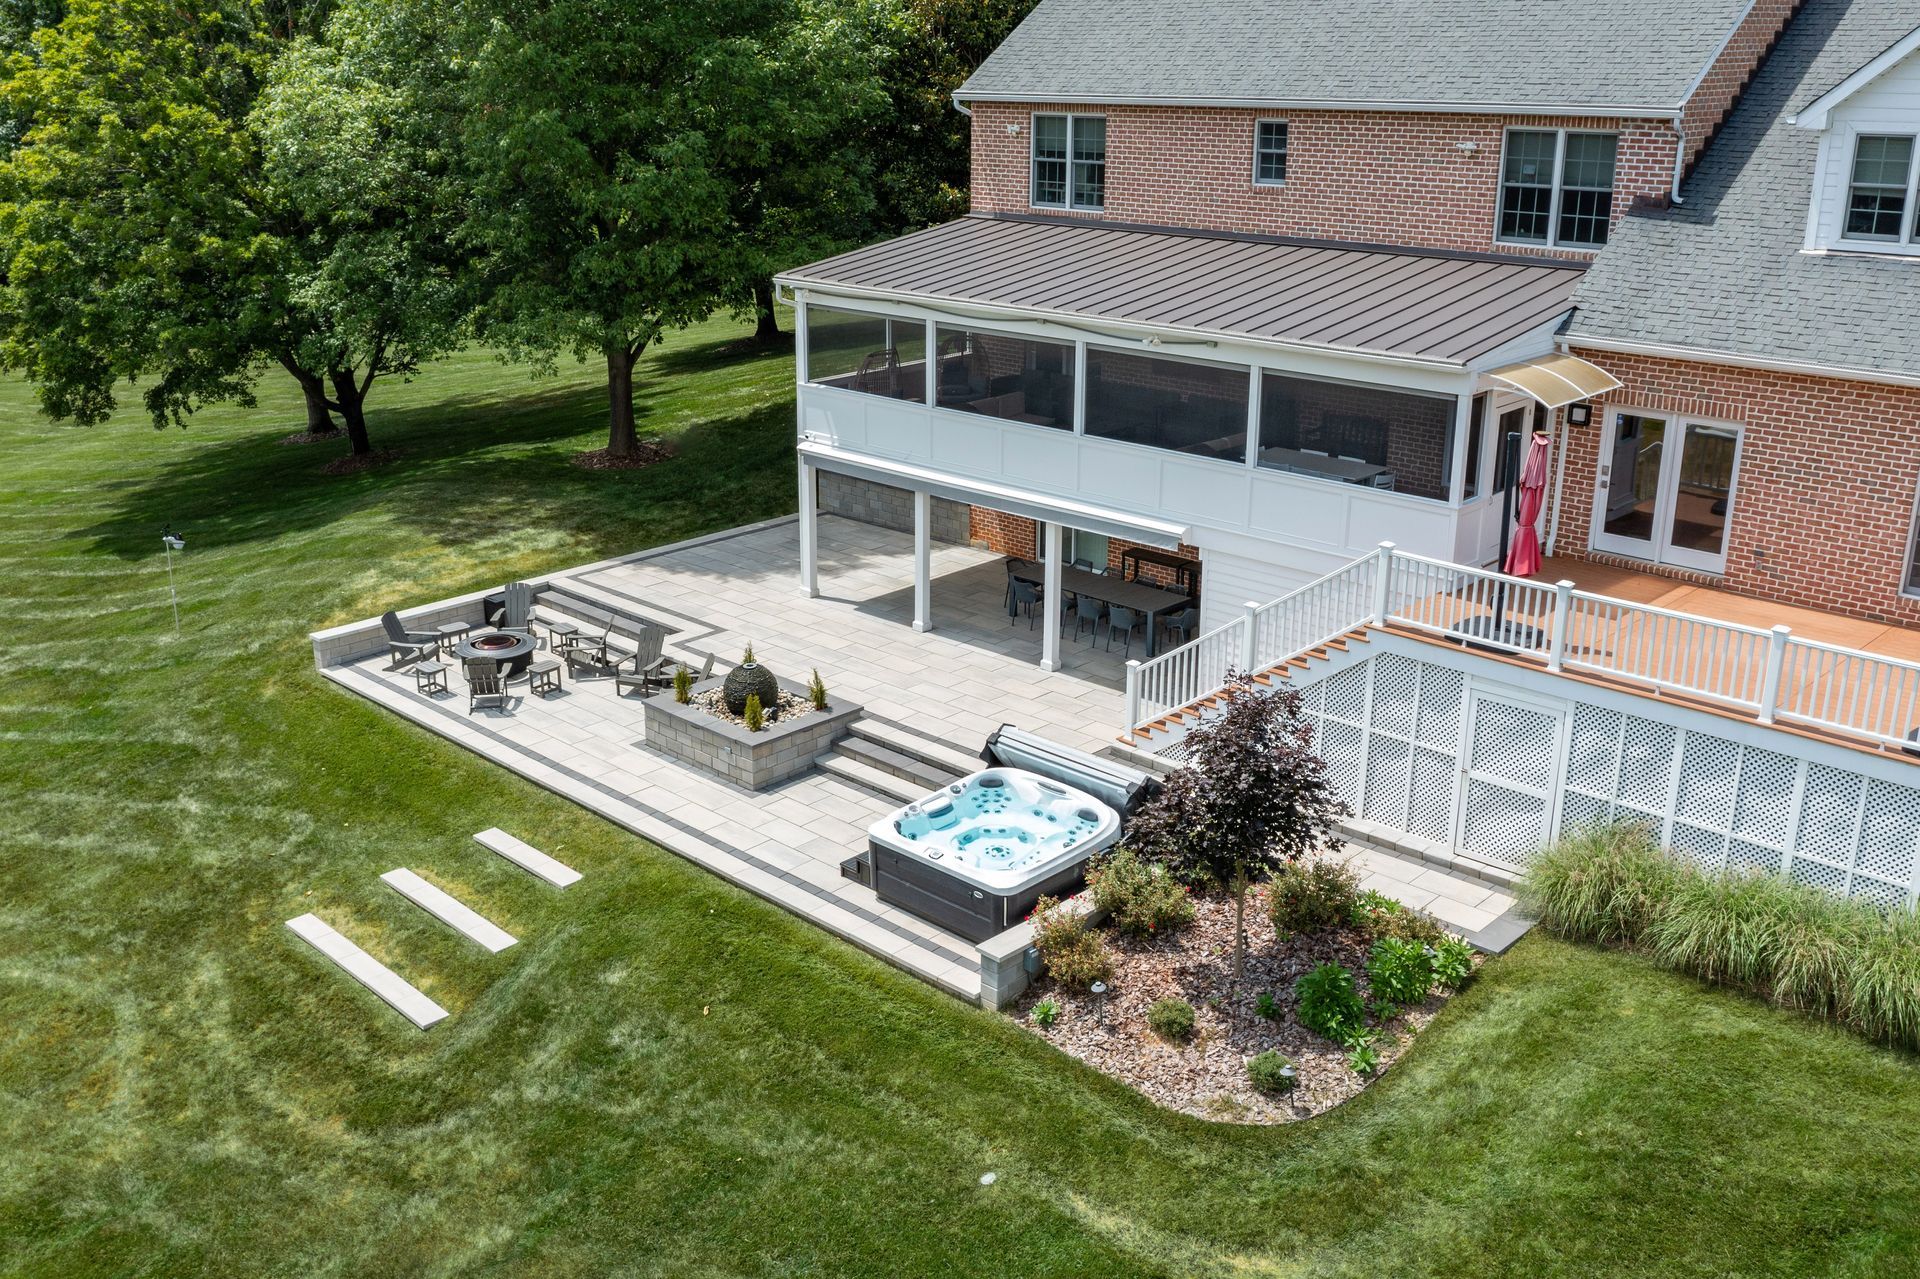
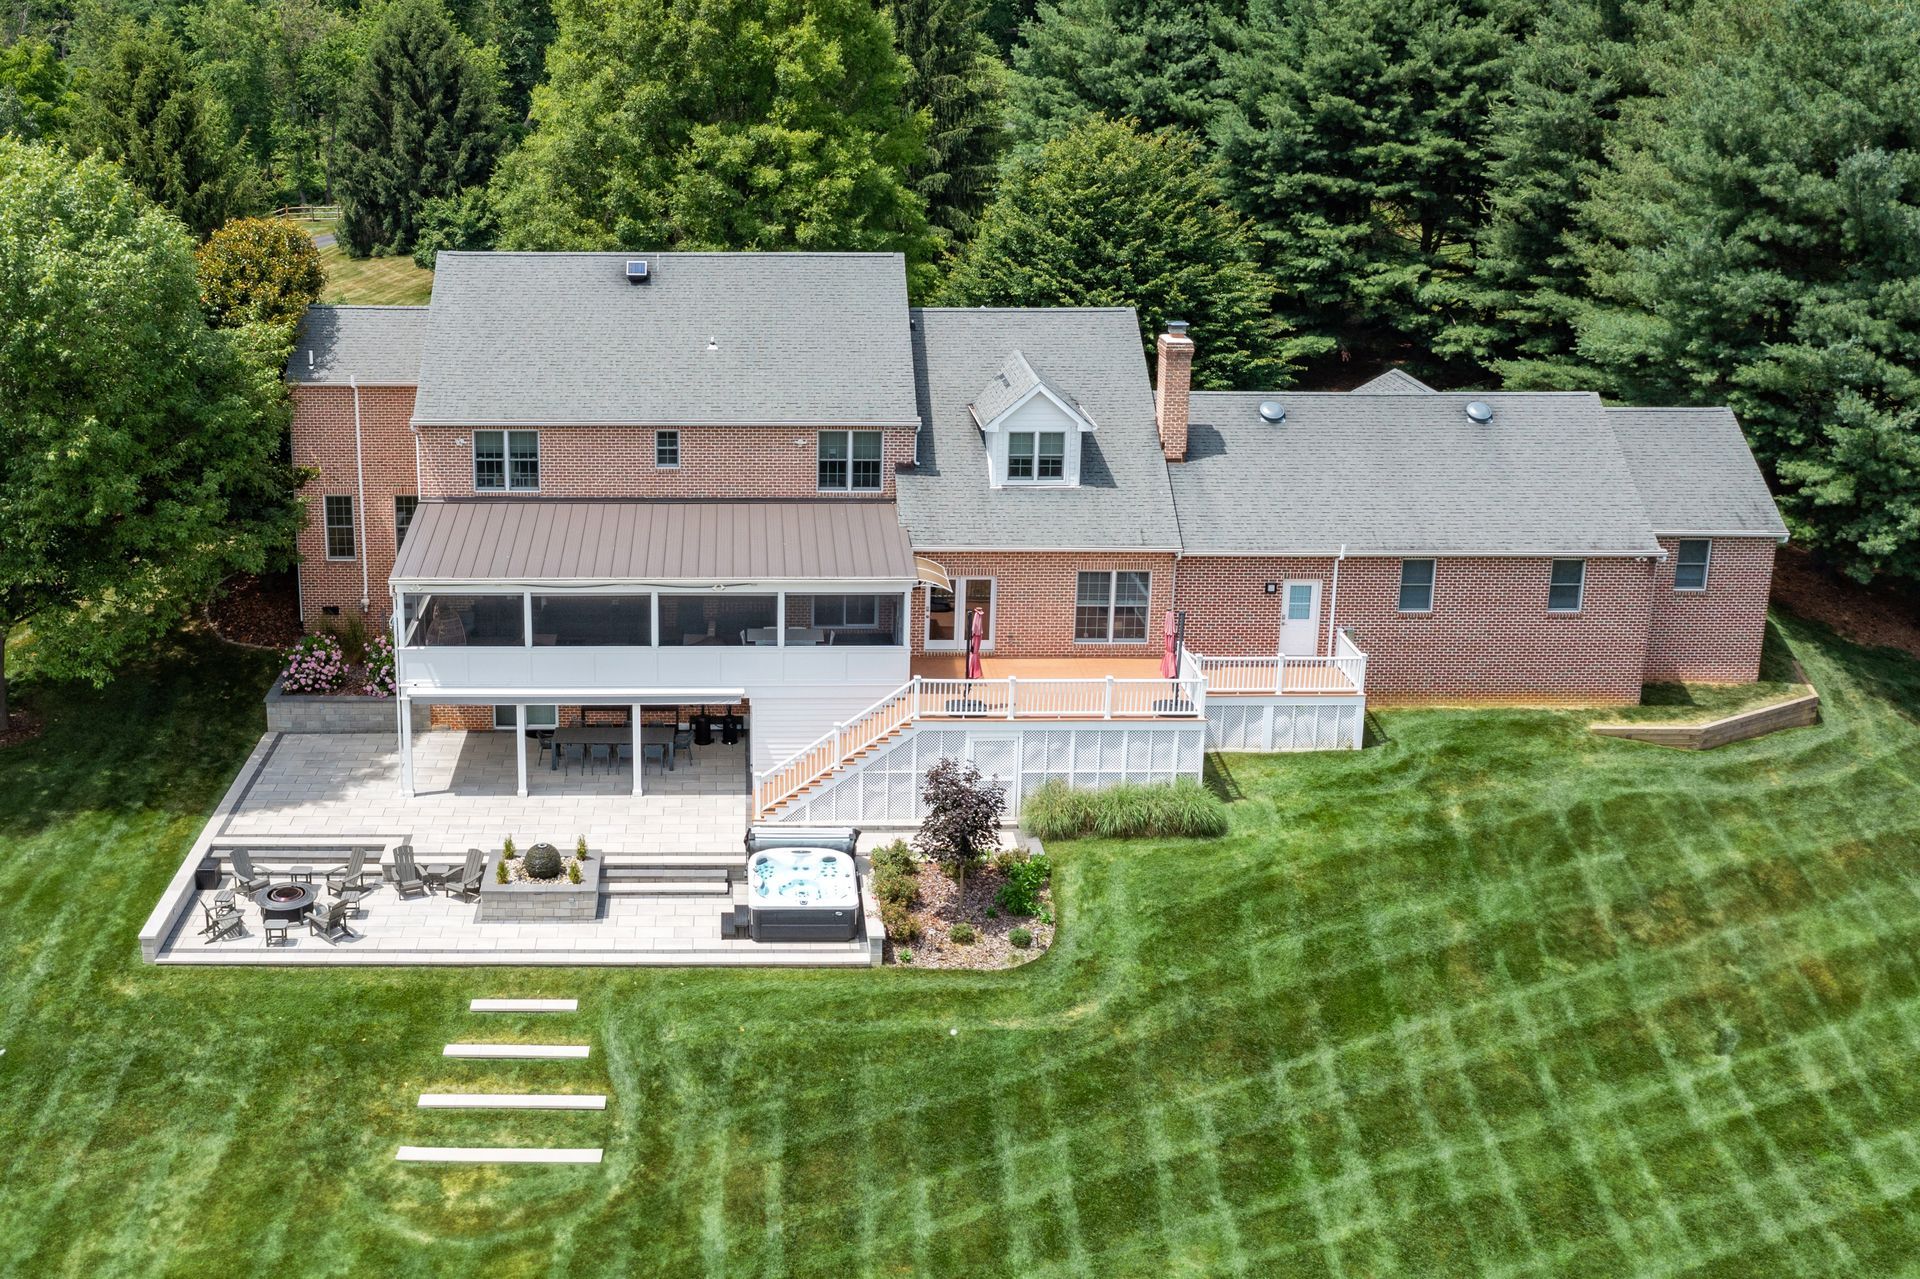
- Multi-level paver patio built across corrected elevations
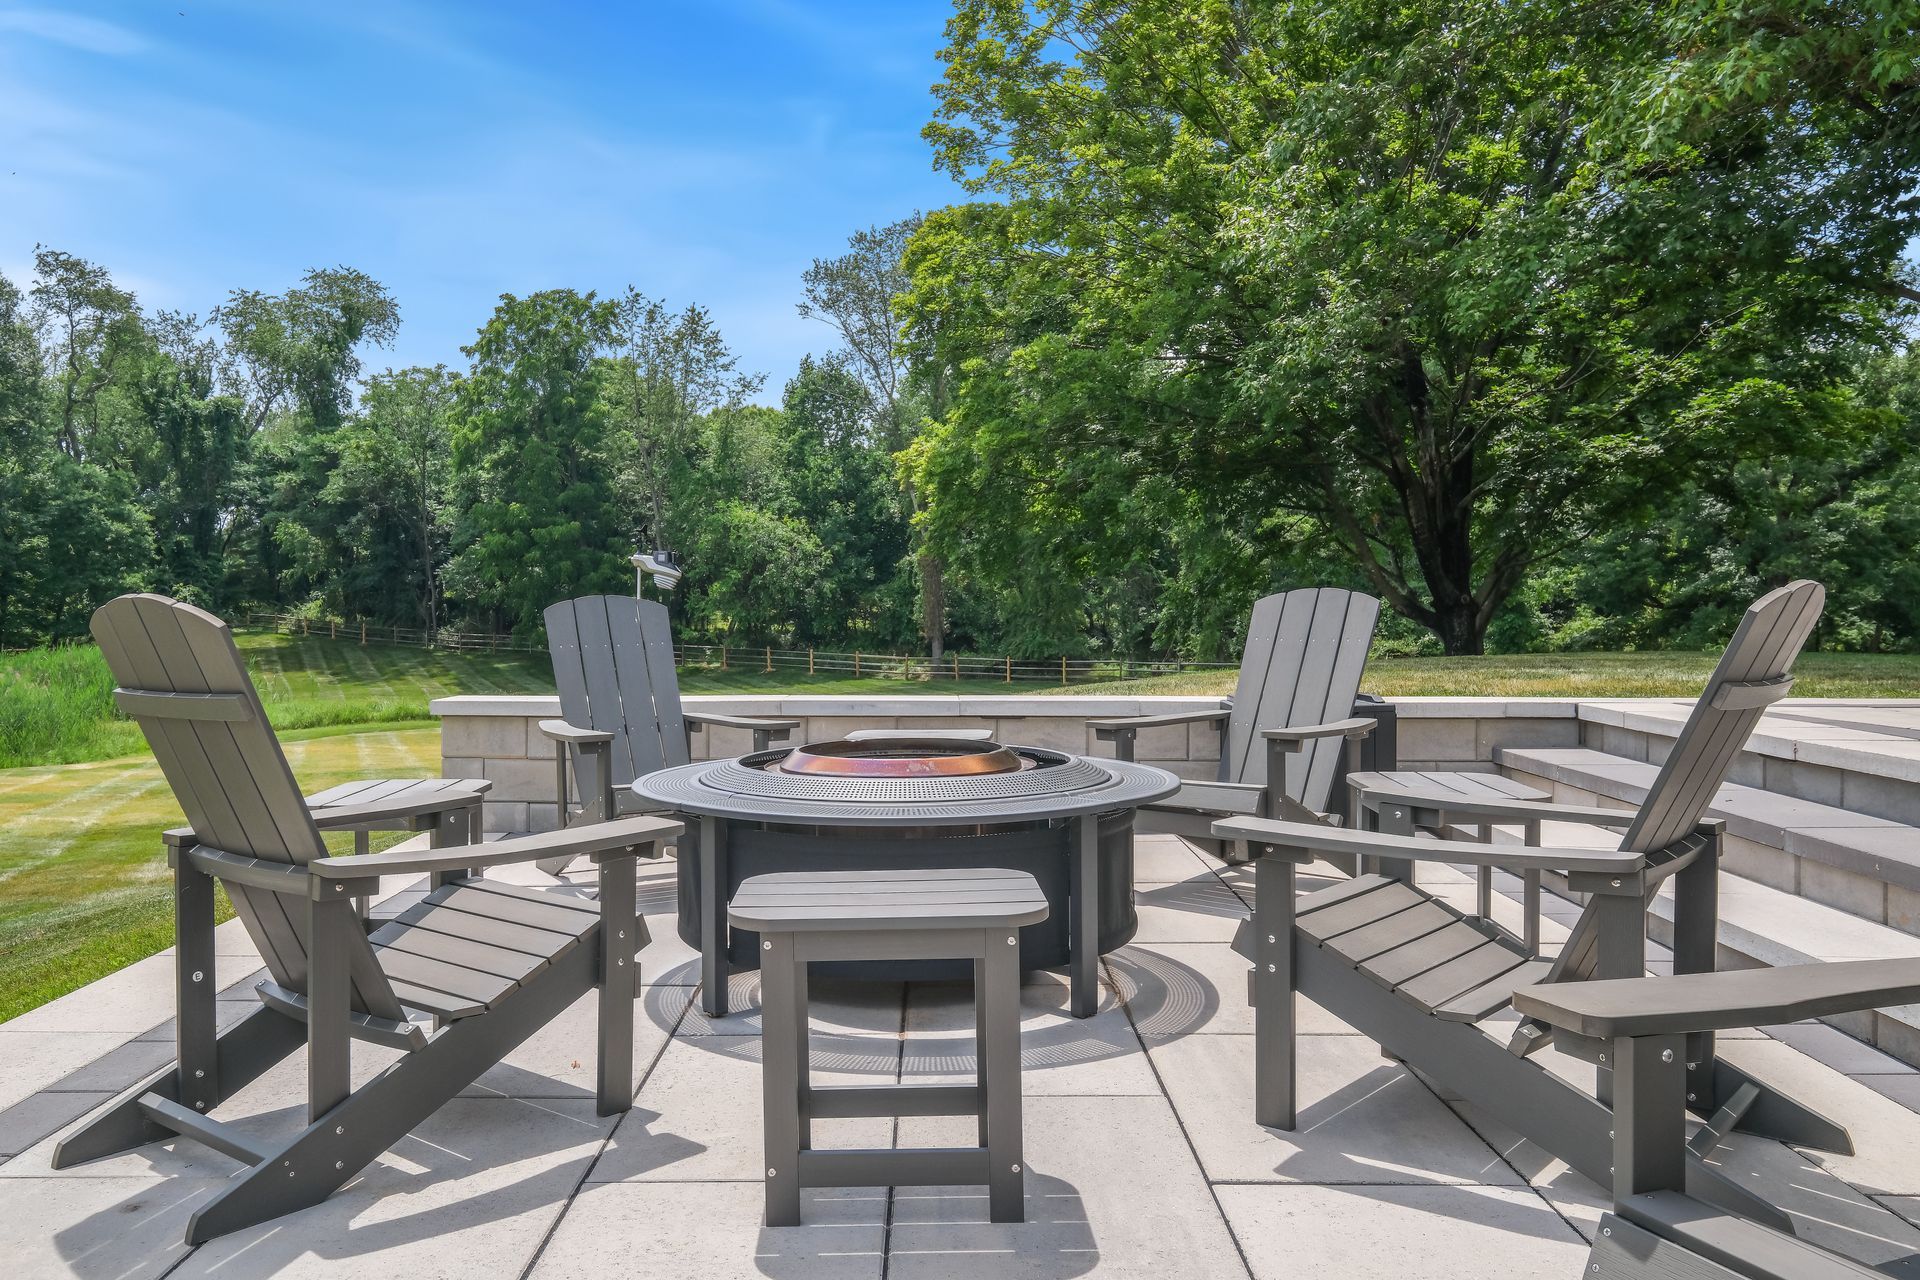
- Large-format slab surface with added surface protection
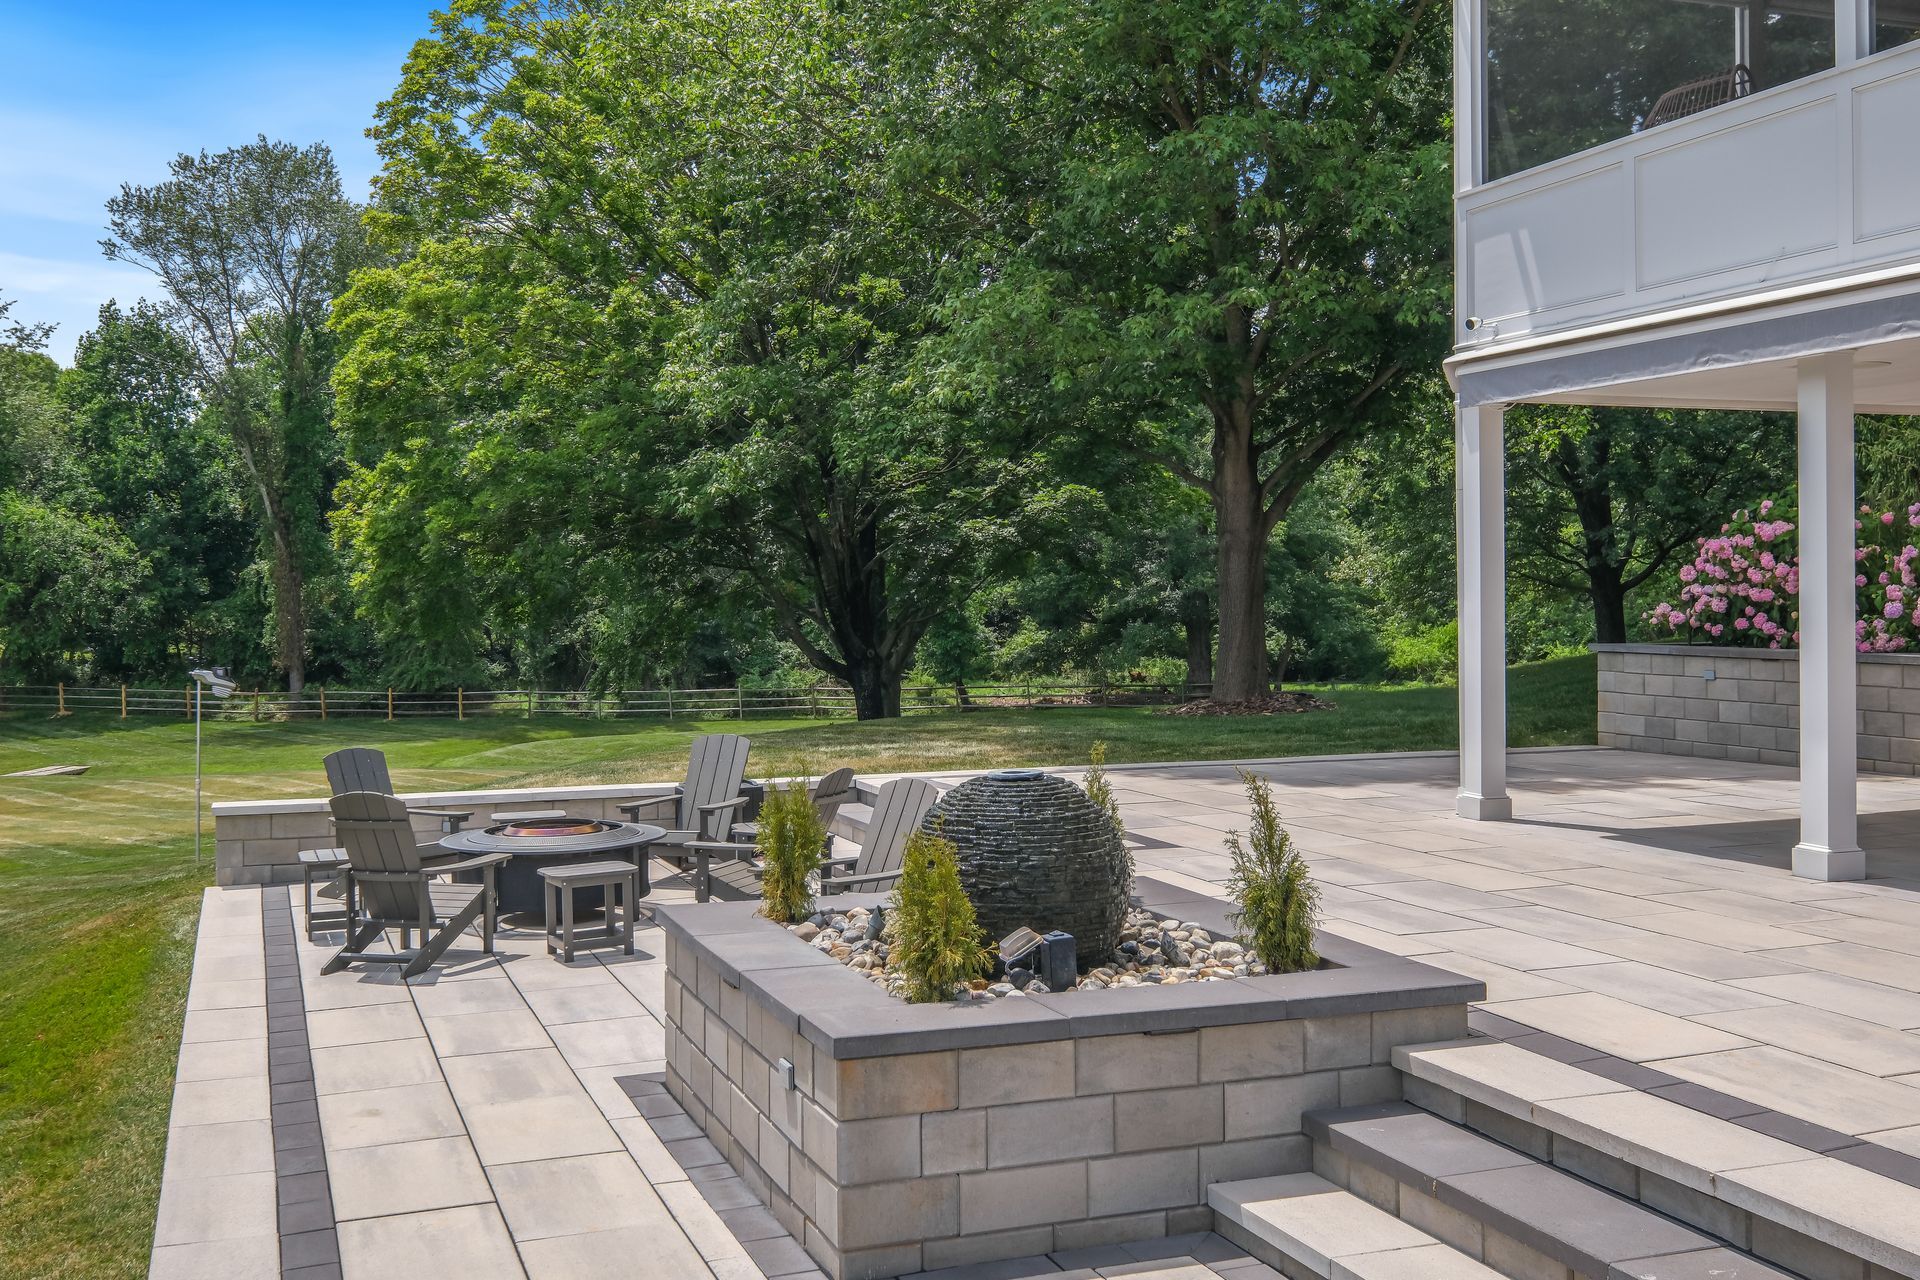
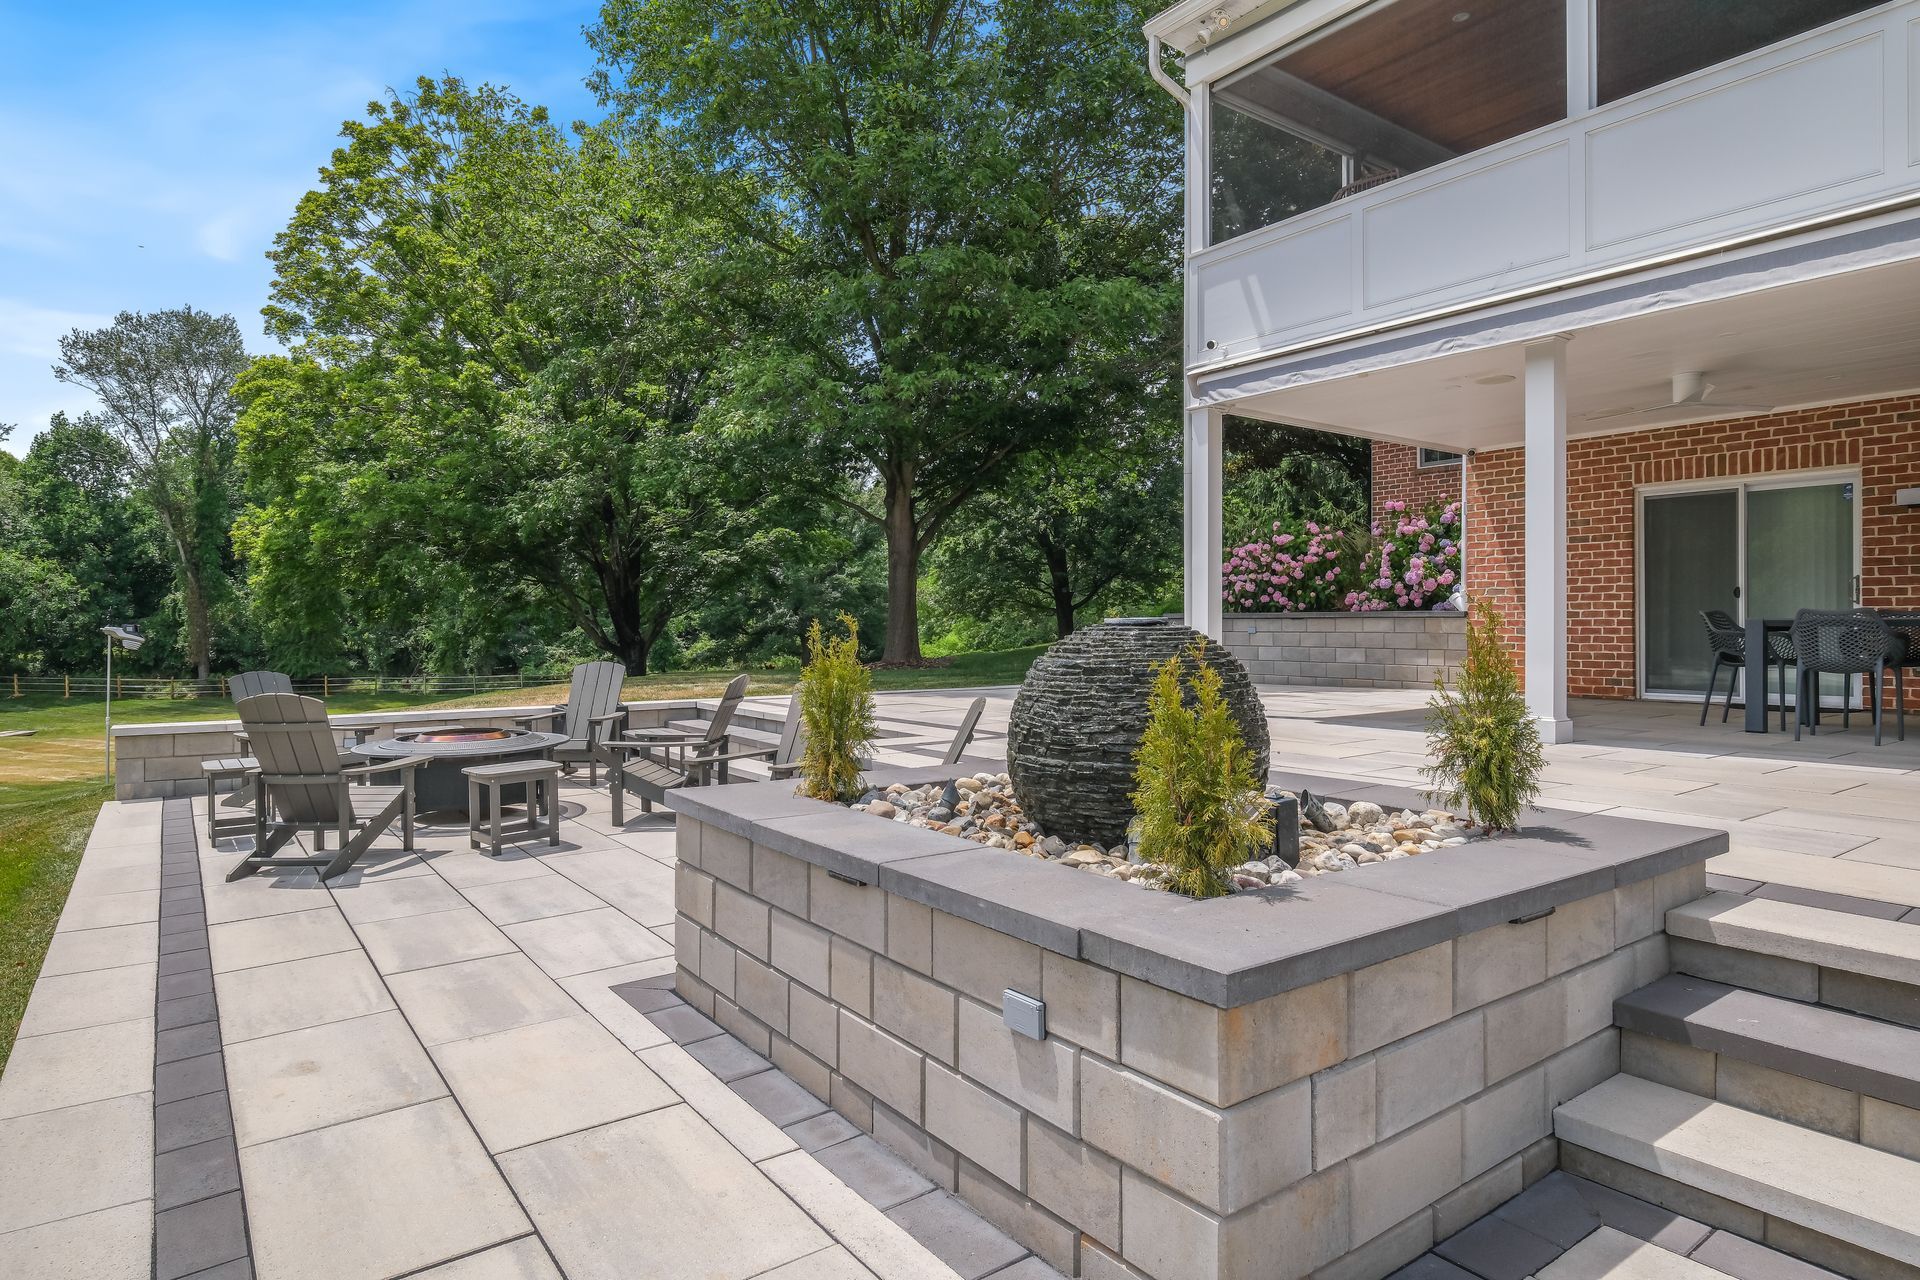
- Custom retaining and sitting walls in a blended two-tone finish
- Tiered wall work and stairs defining each level
- Central water feature as the focal point
- Additional yard steps carrying the patio down into the property
- Front walkway
- Full low-voltage lighting package — feature uplights, under-cap stair lighting, path lighting, and tree uplights
- Fresh landscaping
CHALLENGES
The property came to us with the classic castle look — sitting walls running the entire perimeter, improper drainage, and a footprint boxed in by all that existing stonework. The homeowners wanted the opposite: a sleek, modern space open enough to host large gatherings through the holidays and family get-togethers. The real challenge was elevation — reworking the grades into smooth, sensible transitions between levels while still carving out distinct areas to entertain, and keeping the flow and access points open across the whole patio.
THE PLAN
We started with demolishing the old patio and rebuilding on roughly the same footprint, correcting the drainage in the process. From there the design leaned into the elevation instead of fighting it — tiered retaining and sitting walls with stairs to define each level, and a water feature set in the center as the focal point that breaks up the space and carries a soft, elegant sound to every seat on the patio. Additional yard steps were added so the patio reads as flowing down into the property, then finished with a full low-voltage lighting package and new landscaping. The front walkway was folded into the same scope. Start to finish, the project ran approximately three weeks.
THE RESULTS
The finished space trades the old walled-in layout for a clean, modern entertaining area built across multiple levels.
The tiered walls and stairs give the patio structure and movement, the central water feature anchors it with both a visual focal point and ambient sound, and the yard steps pull the whole design down into the yard.
With uplit features and trees, under-cap lighting on the stairs, and path lighting through the beds, the space carries beautifully into the evening — ready to host large gatherings exactly the way the homeowners envisioned.
Start With a Conversation
Reach out and tell us a little about your property, your goals, and the outdoor space you have been imagining. This first conversation helps us answer initial questions and make sure Bayside Outdoor Living feels like the right potential fit for your project.
Walk the Space Together
If the project feels aligned, one of our design specialists will visit your home to walk the space with you. We will listen to your ideas, study the property, and talk through how you want to live, relax, and gather outside.
Bring the Vision Into 3D
After the on-site visit, your design specialist will begin creating a custom 3D design for your outdoor living space. This typically takes one to two weeks and helps you clearly see how the layout, features, and flow can come together.
Review the Design and Investment
Once the 3D design is ready, we will review it with you in detail. Together, we will walk through the layout, materials, features, and project investment so you understand the full vision and what it would take to build.
Refine the Details and Schedule
If you decide to move forward, we will make any needed adjustments based on your feedback. Once the final details are approved, we will schedule your installation and prepare our in-house team for the build.
Build and Walk It Together
On the start date, your design specialist will walk the space with the team building your project. Throughout the build, we stay connected, communicate clearly, and complete a final walkthrough with you to make sure every detail feels right.